9 Tips for Painting Vinyl Shutters

Are your vinyl shutters looking a little worse for wear? It’s time to give them a fresh coat of paint! But before you grab that brush and start slapping on the color, hold up! Painting vinyl shutters requires some special attention to ensure the paint sticks and looks good. Don’t worry though, we’ve got you covered with these 9 tips for painting vinyl exterior shutters. Follow these guidelines and you’ll have the best-looking shutters on the block (and maybe even impress your neighbors with your newfound DIY skills). So, let’s get started!

Why It’s Important to Paint Your Vinyl Shutters

Painting vinyl exterior shutters is important for both aesthetic and practical reasons. Over time, vinyl shutters can become faded, discolored or damaged due to exposure to the elements. By painting them, you can restore their appearance and make your home look newer and more attractive. Additionally, painting vinyl shutters can also protect them from further damage caused by weather conditions such as rain, wind or sun exposure. A fresh coat of paint can help reinforce the durability of your shutters and prolong their lifespan. Overall, painting vinyl exterior shutters is a simple yet effective way to improve the look and longevity of your home’s exterior.

Tip #1: Clean the Shutters Thoroughly

Explanation of why cleaning is important

It’s essential to clean your vinyl shutters before painting them for several reasons. First and foremost, any dirt or grime on the surface can prevent the paint from adhering properly, causing it to peel or flake off over time. Cleaning the shutters beforehand will ensure that you have a smooth and even surface to work with, resulting in a more professional-looking finish. Additionally, cleaning can reveal any damage or cracks in the vinyl that may need to be repaired before painting. By taking the time to clean your vinyl shutters thoroughly before painting, you’ll not only improve the appearance of your home but also extend the life of your shutters.

Recommended cleaning solutions and tools

When it comes to cleaning your vinyl shutters, it’s important to use the right tools and solutions to avoid damaging the material. First, start by removing any loose dirt or debris with a soft-bristled brush or cloth. Then, mix a solution of warm water and mild detergent in a bucket. Avoid using harsh chemicals like bleach or ammonia, as these can discolor or weaken the vinyl. Instead, opt for gentle cleaners like dish soap or vinegar. Dip a sponge or cloth into the solution and wipe down each shutter thoroughly, paying special attention to any stubborn stains. Rinse off the shutters with clean water and allow them to air dry before painting. By using the right tools and solutions, you can ensure that your vinyl shutters stay looking their best for years to come.

Tip #2: Sand the Surface

Sanding your vinyl shutters is necessary to ensure that the paint adheres properly and lasts as long as possible. Sanding creates a rough surface for the paint to grip onto, which helps it bond more securely to the vinyl. It also removes any glossy or slick surfaces, which can prevent the paint from adhering evenly. When sanding your vinyl shutters, it’s important to use the right grits of sandpaper. Start with a coarse grit (around 80-100) to remove any bumps or imperfections on the surface. Then, move on to a finer grit (around 220-240) to smooth out the surface and prepare it for painting. Be sure to sand lightly and evenly across all surfaces of each shutter. By taking the time to sand your vinyl shutters before painting, you’ll ensure a longer-lasting finish that looks great for years to come.

Tip #3: Prime the Vinyl Shutters

Explanation of why priming is important

Priming your vinyl shutters before painting is essential to ensure that the paint adheres properly and lasts as long as possible. Primer acts as a bonding agent between the surface of the vinyl and the layer of paint, creating an even, durable finish that won’t peel or flake off over time. Without primer, the paint may not adhere evenly or may peel off in certain areas, leaving your shutters looking patchy and unattractive. Additionally, primer can help to seal any small cracks or imperfections in the surface of the vinyl, preventing moisture from seeping in and causing damage over time. By taking the time to prime your vinyl shutters before painting, you’ll ensure a professional-looking finish that stands up to wear and tear for years to come.

Recommended primer types

It’s important to choose a primer that is compatible with the type of paint you plan to use and follow all manufacturer instructions carefully for best results. When in doubt, consult with a professional or do some research to find the best primer for your specific project. By choosing the right primer, you’ll ensure that your painted vinyl shutters look great and last as long as possible.

Tip #4: Choose High-Quality Paint

Durability and Appearance

The quality of paint you choose can have a significant impact on the durability and appearance of your finished project. High-quality paints are designed to adhere well to surfaces, resist fading and chalking over time, and withstand exposure to the elements without cracking or peeling. On the other hand, low-quality paints may be more prone to these issues, leading to a shorter lifespan for your painted surface. Additionally, high-quality paints tend to offer better coverage and a smoother finish with fewer brush strokes or roller marks. This can result in a more professional-looking final product that is both aesthetically pleasing and long-lasting. When selecting paint for your project, it’s important to consider factors such as the surface you’ll be painting, the conditions it will be exposed to, and your desired appearance goals in order to choose the best quality paint for your needs.

Recommended Paint Types

  • Look for paints that are specifically formulated for use on vinyl shutters. These will typically offer superior adhesion and flexibility compared to standard exterior paints.
  • Acrylic latex paints are a good choice for vinyl shutters, as they are durable and resistant to fading and weathering.
  • Choose a paint that is labeled as “vinyl-safe” or “vinyl-specific” to ensure compatibility with the material.
  • Consider using a primer designed for use on vinyl before painting, as this can help improve adhesion and prolong the life of the finish.
  • Avoid using oil-based paints on vinyl shutters, as these may not adhere well to the surface and can lead to cracking or peeling over time.
  • Look for paints that offer UV protection to prevent fading and chalking over time.

Tip #5: Application Methods for Vinyl Shutters

When painting vinyl exterior shutters, there are two common methods: using a roller or a brush. Here’s how to use each method effectively:

Using a Roller:

  1. Begin by cleaning the shutters with soap and water, then rinse thoroughly and allow them to dry completely.
  2. Apply painter’s tape to any areas you don’t want to paint, such as hinges or handles.
  3. Pour your vinyl-safe acrylic latex paint into a paint tray.
  4. Dip your roller into the paint and roll it back and forth on the tray to evenly distribute the paint on the roller.
  5. Apply the paint in long, even strokes, working from top to bottom, until the entire shutter is covered.
  6. Allow the first coat of paint to dry completely before applying a second coat if necessary.

Using a Brush:

  1. Clean the shutters with soap and water, rinse thoroughly, and allow them to dry completely.
  2. Apply painter’s tape to any areas you don’t want to paint, such as hinges or handles.
  3. Pour your vinyl-safe acrylic latex paint into a bucket or can.
  4. Dip your brush into the paint and remove excess by tapping it against the side of the container.
  5. Use long brush strokes to apply the paint evenly over each shutter panel.
  6. Be careful not to leave brush marks or drips in the finish; work quickly but carefully until all panels are coated with one layer of paint.
  7. Allow this first coat of paint to dry completely before applying additional coats if needed.

Remember that when painting vinyl exterior shutters, it’s important to choose paints that are specifically formulated for use on vinyl surfaces – this will ensure maximum adhesion and durability over time!

Using a Paint Sprayer

Using a paint sprayer to paint vinyl exterior shutters offers numerous benefits over brush or roller applications. Paint sprayers allow for an even and consistent coverage of the surface, which helps to ensure that the finish is smooth and uniform. Additionally, it can often help reduce the amount of time spent on the project, as it can be completed more quickly than with a brush or roller. Paint sprayers also typically provide better coverage than a brush or roller, meaning less paint is needed to achieve full coverage. Finally, they are often able to reach corners and other hard-to-reach areas much more easily than a brush or roller. Overall, using a paint sprayer is an efficient and effective way to paint vinyl shutters that will result in an attractive and long-lasting finish.

Here are some steps to follow:

  • Remove shutters from house (optional)
  • Set up a spraying station in a well ventilated area
  • Clean the shutters with soap and water, then rinse thoroughly and allow them to dry completely.
  • If you don’t choose to remove shutters, be sure to use painters tape with the addition of paper or plastic sheathing around windows and shutters.
  • Choose a high-quality sprayer designed for use with vinyl-safe acrylic latex paints.
  • Pour your paint into the sprayer’s container, following the manufacturer’s instructions for proper dilution and mixing.
  • Adjust the sprayer’s nozzle to achieve the desired spray pattern – typically a narrow fan pattern will work best for shutters.
  • Hold the sprayer about 6-8 inches away from the shutter panel and begin spraying in long, even strokes.
  • Work from top to bottom, overlapping each stroke slightly until the entire panel is covered.
  • Be careful not to apply too much paint at once or it may run or drip; multiple light coats are better than one heavy coat.
  • Allow each coat of paint to dry completely before applying additional coats if needed.

Tip #6: Apply Thin Coats

Thin Coats Vs. Thick Coats

When painting vinyl exterior shutters, it’s important to understand the benefits of applying thin coats instead of thick ones. Thin coats are better than thick coats because they provide a more even coverage, help reduce paint waste, and can be applied faster with less risk of drips or runs. Additionally, multiple thin layers will generally result in a higher quality finish that is more durable over time. Applying thin coats also helps to avoid brush marks or roller lines from forming on the surface which can detract from the overall look of your finished project. So if you want an attractive and long-lasting finish for your vinyl exterior shutters, remember to apply thin coats!

Recommended number of coats

To achieve the best results when painting vinyl exterior shutters, it is recommended to apply at least 2 to 3 coats of paint. Each coat should be thin and even, allowing time for drying between each layer.

Tip #7: Recommended Dry Times for Vinyl Shutters

How drying time affects the final result

For an attractive and long-lasting finish, it is important to allow paint to dry in between coats when painting vinyl exterior shutters. This will help ensure a more even coverage and a higher quality outcome overall. It is recommended that you wait at least two hours for each coat of paint to dry before applying additional layers, although longer drying times may be necessary depending on the type of paint used. Allowing adequate time for the paint to dry in between coats will also help reduce the risk of runs or drips which can detract from the final look of your project.

Tip #8: Protect Surrounding Areas During Painting Process

If you’re painting vinyl exterior shutters, you want to make sure that the paint doesn’t end up anywhere it shouldn’t be. After all, no one wants to spend their time scrubbing off unwanted splatters from their windows or siding! So how can you protect your surrounding exterior areas from paint damage? Fortunately, there are a few easy steps that you can take to ensure your project is mess-free and successful.

1. Cover any areas that are within 6-8 feet of the shutters with a tarp or plastic sheeting. Make sure to secure the covering with tape or weights so that it does not move during painting.

2. Apply painter’s tape along any edges where you do not want paint to go, such as around windows and other trim pieces.

3. Use a spray shield when using a sprayer to help contain over spray and avoid messes in unwanted areas.

4. Place a drop cloth beneath the area being painted in order to catch any drips or spills while painting. This will also help protect underlying surfaces from accidental staining caused by spilled paint.

5. After spraying, allow ample time for the paint to dry before removing covering or tape around windows and trims, as wet paint could still get onto these surfaces if handled too early.

Tip #9: Maintain Your Vinyl Shutters Regularly After Painting

Maintaining your shutters regularly after painting can be beneficial in more ways than one. Not only will it help ensure that your shutters look great for a longer period of time, but it can also help maintain their structural integrity and extend the life of the paint job. Regular maintenance should include periodic cleaning with a soft cloth, such as microfiber, to remove any dirt and dust buildup on the surface. For best results, use a mild detergent and water to gently scrub off any stubborn grime or dirt. Additionally, keeping up with necessary repairs in a timely manner is important for preserving both the appearance and life expectancy of your painted shutters.

Let’s Recap

Painting vinyl exterior shutters can be a challenging task if you don’t have the right information and tools. By following these nine tips on painting vinyl exterior shutters that we’ve discussed in this blog post, you’ll be able to achieve a professional-looking finish for your project with ease. From prepping the surface before starting any paint job to protecting surrounding areas from accidental splatters or spills and maintaining your shutters regularly after painting – these comprehensive steps will help ensure success when tackling this type of home improvement! So now that you know all there is to know about properly painting vinyl external shutters, what are you waiting for? Get out there and get started transforming those outdated old shutters into something new and improved today!

Hiring a Professional

At Cova Painting, we’re more than just a team of skilled professionals; we’re dedicated to quality and excellence in every painting project. With years of experience in the industry, our experts know exactly how to transform any space with impeccable results. We use only the best paints and materials for a flawless finish that will last for years. Whether you need interior or exterior painting services, we have all the tools and expertise to ensure your project is done right the first time. No more delay or unmet expectations — with Cova Painting, you can trust that your satisfaction is guaranteed! Contact us today and let our team help you create the perfect look for your space.

Painting Exterior Brick: A Comprehensive Guide

Painting exterior brick can be a daunting task, but with the right knowledge and tools, it doesn’t have to be! Whether you want to spruce up your home’s curb appeal or give it a complete makeover, painting exterior brick is one of the most cost-effective ways to do so. In this comprehensive guide we’ll take you through everything from prepping and priming your bricks for paint to choosing the best paint type for lasting results. So grab your brush and let’s get started on transforming that dull looking brick into an eye-catching masterpiece!

Preparing Your Exterior Brick for Painting – What You Need to Know

Before you begin the task of painting your exterior brick, it’s important to properly prepare the surface for a lasting finish. This means not only cleaning and repairing any damage to your bricks, but also choosing the right primer and paint type that will adhere well to masonry surfaces. Taking time to do this step correctly can save you lots of headaches down the road when it comes time for touch-ups or repainting. In this guide we’ll provide all the information you need on how to prep your exterior brick for painting!

Selecting the Right Paint Type for Lasting Results

When it comes to painting exterior brick, selecting the right paint type is key for creating a lasting finish. Different types of paint have different properties that make them better suited for certain surfaces and climates. For example, oil-based paints are known for their durability and resistance to water damage, while acrylic latex paints are more flexible and allow moisture to evaporate from the surface. It’s important to do your research when choosing the best type of paint for your project so you can be sure you’ll get the results you want!

  • Oil-based paints provide a durable and waterproof finish
  • Acrylic latex paints are flexible and allow moisture to evaporate from the surface
  • Epoxy paint is highly resistant to weathering, mildew, and fading
  • Elastomeric paint provides superior flexibility over traditional coatings

Prepping and Priming Your Bricks for Painting

Prepping and priming your bricks for painting is an important step in achieving a lasting finish. It’s important to properly clean and repair any damage to the brick surface before beginning the painting process, as well as selecting the right primer and paint type that will adhere best to masonry surfaces. Here are some steps you can take to ensure your exterior brick is prepped and primed for painting.

Prepping and Priming

  1. Clean Surface: Before applying any paint or primer, it’s essential to thoroughly clean the surface of your exterior brick with a mild detergent solution or trisodium phosphate (TSP). This will remove dirt, dust, and other debris that may interfere with adhesion. Be sure to rinse off any residue when finished.
  2. Repair Damage: If necessary, repair any cracks or chipped areas on the brick with an appropriate material such as mortar mix or epoxy-based patching compound. Allow plenty of time for these repairs to completely dry before continuing onto the next step.
  3. Apply Primer: Once all repairs are complete, it’s time to apply a quality masonry primer specifically designed for use on exterior brick surfaces. This will help improve adhesion between the masonry surface and the top coat of paint that will be applied later on. Use a brush or roller to apply an even coat of primer over the entire area you plan on painting, including in between grout lines if applicable.

Getting Ready To Paint

  1. Choose Paint Type: With your primed surface ready for action, now it’s time to select a paint type that is best suited for your project needs and climate conditions. Oil-based paints provide great durability against water damage while acrylic latex paints allow moisture vapor transfer through their flexible composition – making them ideal for areas prone to humidity changes such as coastal regions. Epoxy paints provide superior weather resistance against fading and mildew while Elastomeric paint offers superior flexibility over traditional coatings – making them perfect choice in climates where temperature fluctuates drastically throughout seasons like those found in higher elevations and mountainous regions..
  2. Test Paint Color: Before committing fully to a topcoat color of paint, test out various shades by applying small patches across one section of your exteriors bricks – this way you can see what colors would work best before applying one large coat across all surfaces!

Prepping and priming your exterior bricks properly before painting will help ensure a lasting finish that looks great no matter what kind of weather comes its way. Follow these simple steps to achieve the best results.

Best Colors to Complement Your Home’s Exterior Design

  1. Take into consideration the overall aesthetic of your home’s exterior when deciding on which colors to use. If you have a modern style home, consider vibrant and bold colors such as oranges, yellows, and blues. For a more traditional home, muted tones like beiges, browns, and grays are often best.
  2. Keep in mind the color of your roof when selecting colors for your home’s exterior paint. Generally speaking, you want to pick colors that will complement the color of your roof; for example, if you have a dark charcoal-gray roof, consider painting with cooler shades like blues or greens instead of warmer colors like oranges or reds.
  3. Analyze the environment surrounding your home before deciding on an exterior paint color. Factors such as nearby buildings and foliage should be taken into account so that you can choose a color that will stand out in an elegant way while still complimenting its surroundings.
  4. Consider the amount of sunlight that hits your home’s exterior throughout the day before selecting paint colors; certain lighter hues may begin to fade quickly in direct sunlight while darker shades can absorb too much heat and cause greater energy costs during the summer months.
  5. Test out different combinations of paint samples before committing to one particular shade; this will give you a better idea as to how each individual hue will look against both its surroundings and other colors before applying one larger coat across all surfaces!
  6. Before you start painting, take into account any special features present on your home’s exterior such as doors, shutters or windows. Paint these items in different colors than walls or siding so they stand out from one another and provide visual interest and depth to an otherwise plain surface.

  7. Remember that neutral colors tend to always work well no matter what type of house design you have; whites, grays and beiges are timeless classics that can add subtle sophistication to any type of architecture!
  8. Don’t forget about trim work when selecting colors for a house’s exterior! Trim pieces such as window frames provide great opportunity for adding contrast with a different hue than used elsewhere on the property; consider using brighter tones like light blues or pinks against white walls to create an attractive focal point around windows and doors!

Applying the Paint with Precision and Care

Painting exterior brick isn’t just a matter of slapping on some paint and calling it a day. It requires precision, care, and attention to detail in order to achieve the desired results. After all, your home’s exterior is its first impression – you want it to look good! To ensure that your brick looks great once painted, there are certain steps you need to take before applying the actual paint. From prepping and priming surfaces beforehand, to choosing complementary colors afterwards – painting exterior brick can be an involved process but one that will pay off in the end with stunning results!

To Wrap Things Up

Painting the exterior of your home is a great way to give it an updated look, increase its value and make it more inviting. With careful consideration of color palette combinations, roof colors, sunlight exposure and special features such as windows or doors, you can create a stunning finish that stands out from other homes in the neighborhood. Additionally, with precision application techniques like prepping surfaces before painting and adding trim work for contrast – you’ll be sure to have a lasting paint job that looks beautiful no matter what kind of weather comes its way! So take some time today to consider how you could use these tips on improving your home’s exterior design – trust us when we say there are plenty of ways to update yours without breaking the bank!

Need a Painter?

If you want to ensure a flawless finish and expert quality in your painting project, look no further – our team of skilled professionals are here to provide top-notch service and exceed your expectations. Let us help you transform your space with confidence. Contact the Cova Painting team today!

The Ultimate Guide to Painting Wood Shutters

Wooden shutters are a beautiful addition to any home, but over time they can become faded or damaged due to exposure to the elements. Painting your wood shutters is a great way to give them a fresh new look and protect them from further damage. Not only does painting your shutters improve their appearance, it also helps to extend their lifespan and prevent rotting or warping. Additionally, painting your shutters allows you to customize the color and style of your home’s exterior, giving it a unique and personalized touch. So whether you’re looking to refresh the look of your home or simply maintain the quality of your wooden shutters, painting is a smart choice.

Here are some benefits of a proper paint job for wood shutters:

  • Protection from weather: Wood shutters are susceptible to damage from moisture, sunlight, and extreme temperatures. A high-quality paint job can help protect them from these elements and prevent warping, cracking, or rotting.
  • Improved curb appeal: Painting your shutters can instantly boost your home’s curb appeal and make it stand out in the neighborhood. You can choose a color that complements your home’s existing color scheme or go for something bold and eye-catching.
  • Cost-effective: If your wood shutters are still in good condition but have lost their luster over time, painting them is a cost-effective way to give them new life without having to replace them entirely.
  • Customization options: With so many colors and finishes available, painting your shutters gives you the flexibility to customize their look to suit your personal style. You can even experiment with different textures or patterns for a unique touch.

Overall, investing in a proper paint job for your wood shutters is an easy way to improve both the look and longevity of your home’s exterior.

Choosing the Right Paint and Equipment

There are several types of paint available for wood shutters, each with its own set of pros and cons. Here’s a breakdown of some of the most common types:

Latex Paint

Pros:

  • Dries quickly
  • Easy to clean up with soap and water
  • Low odor

Cons:

  • May not adhere well to certain surfaces without proper preparation
  • May require multiple coats for full coverage

Oil-Based Paint

Pros:

  • Durable and long-lasting
  • Provides a smoother finish than latex paint
  • Adheres well to most surfaces

Cons:

  • Takes longer to dry than latex paint
  • Requires mineral spirits or turpentine for cleanup, which can be messy and emit strong fumes

Acrylic Paint

Pros:

  • Resistant to fading, cracking, and peeling
  • Can be used on a variety of surfaces, including wood, metal, and plastic
  • Low odor and easy cleanup with soap and water

Cons:

  • May require more coats for full coverage than oil-based paint
  • Difficult to remove once dry

For optimal results, we recommend using Sherwin Williams’ Emerald Exterior Acrylic Latex Paint when painting wood shutters. This durable and long-lasting paint is designed to provide superior coverage and adhesion, ensuring a beautiful finish that stands the test of time.

If you live in an area that is hit with extreme weather and moisture, Sherwin Williams’ Latitude Exterior Acrylic Latex is ideal.

Milk Paint

Pros:

  • Non-toxic and environmentally friendly
  • Produces a unique matte finish that highlights the natural grain of the wood
  • Easy cleanup with soap and water

Cons:

  • May require additional prep work such as sanding or priming before application
  • Limited color options compared to other types of paint

Ultimately, the type of paint you choose will depend on your personal preferences as well as the surface you’re painting. It’s important to consider factors such as durability, ease of use, and cleanup when making your selection.


Choosing the Right Equipment

  1. Invest in quality brushes and rollers: High-quality brushes and rollers will give you better control over your paint application and result in a smoother finish.
  2. Choose appropriate tools for your project: If you’re working on a large project, consider using an airless sprayer instead of traditional brushes or rollers to save time.
  3. Protect yourself: Wear appropriate safety gear such as goggles, gloves, and masks to protect yourself from fumes and accidental spills.

By taking these factors into consideration when choosing your paint and equipment, you’ll be well on your way to achieving a professional-looking finish on your next painting project.

Preparing Your Workspace

Before you start painting your wooden shutters, it’s important to prepare your workspace for the job. Proper preparation can help ensure that you achieve a professional-looking finish and protect yourself from any potential accidents or messes.

Here are some tips on how to get started:

  • Gather the necessary supplies such as brushes, rollers, paint, tray and drop cloths
  • Prepare the area by removing furniture and other items that may be in the way
  • Clean the surfaces to be painted thoroughly with a damp cloth or sponge
  • Protect your floors and walls by laying down a heavy-duty tarp or drop cloths
  • Cover any areas you don’t want to get painted with painter’s tape or newspaper
  • Wear safety gear such as goggles, gloves and masks to protect yourself from fumes and accidents

Painting Your Wood Shutters

Once you have prepared your workspace, it’s time to start painting your wood shutters. Before proceeding, make sure that your shutters are free from dirt and dust, as these can interfere with the paint adhering properly.

Use a Primer

First, use a primer to prepare the surface of the shutters. This will help ensure that the paint has a good base to adhere to and will also provide extra protection against weathering. Be sure to apply an even coat of primer over all surfaces of the shutters and allow it time to dry before proceeding with the painting.

Apply the Paint

When it is time to begin applying the paint, always start at one end of each shutter and work towards the other side. For oil-based paints, use a brush with natural bristles for best results; for latex paints, use synthetic bristles. When applying either type of paint, remember to follow all directions given on the can regarding how long the paint should be left on each side before being moved onto another area. Be sure to maintain an even pressure throughout for an even finish.

Using a Roller or Sprayer

If you’re using a roller or sprayer for larger surfaces, be not to overdo it on one area as this can lead to dripping or runs in your paint job. Always wait until one section is completely dry before moving onto another section so that any existing runs or drips don’t spread further across your project.

Drying and Curing Time

Once you’ve finished painting both sides of each shutter, give them adequate time for drying. You will need to inspect them closely for any defects in order ensure that everything looks great when they’re mounted back onto your home’s exterior.

Follow these tips below:

  • Allow up to 24 hours for drying after painting both sides of the shutters, and move them into a dry location such as a garage or shed to protect them from rain during this time.
  • Make sure that adequate ventilation is provided while the paint is drying in order to reduce odors and fumes.
  • If necessary, use a fan or dehumidifier to help speed up the drying process.
  • Inspect the shutters closely once they are dry, looking for any defects in the paint job that may need further attention.
  • Depending on the type of paint used, it may take several days or weeks for it to fully cure — generally speaking, oil-based paints take longer than latex ones.
  • To ensure that your wood shutters look their best for years to come, apply a clear coat protective layer once the paint has cured. This will help protect them from fading due to weather conditions and keep them looking new for longer.

Touch-ups and Maintenance

Handling Touch-Ups

When painting wood shutters, it is important to always plan for potential touch-ups that may be necessary afterwards. This could include repainting any areas that were missed the first time around or fixing scratches, dents or other imperfections. To make sure that your wood shutters look their best, here are a few tips on how to handle any necessary touch-ups:

  • Start by lightly sanding down any areas that need repair, with extra care taken not to damage the surrounding paint. This will help to ensure an even finish when applying fresh paint.
  • If you wish, use a product such as wood filler to fill in any small dents or rough spots before sanding them down.
  • Next, apply a primer to all affected areas in order to provide a good base for the new paint and give it maximum protection against the elements. Allow this to dry thoroughly before proceeding.
  • Once dry, use either oil-based paint (for natural bristles) or latex paint (for synthetic bristles) and carefully apply fresh coats of paint over the designated areas. Again, make sure that adequate ventilation is provided during application and allow plenty of time for each coat of paint to dry completely before moving onto another area.

Maintain Painted Wood Shutters Over Time

In addition to handling touch-ups after initial application of your wood shutters’ painting job, it is also important to remember proper maintenance in order for them to last longer with minimal upkeep required. This includes cleaning the shutters periodically with soapy water or specialized products available at most home improvement stores, as well as inspecting them regularly for chips, scratches and other signs of damage. If you spot any issues, be sure to address them right away in order to preserve the look and quality of your wood shutters!

Painting wood shutters can be a time-consuming but rewarding task that adds charm and character to your home’s exterior. By following the tips outlined in this article, you will ensure that your painting job is done right the first time around with minimal touch-ups required down the line. So what are you waiting for? Get out there and start giving those old wooden shutters some much needed TLC today!

Need A Professional Painter?

Our experienced painting crew will assess the condition of your shutters and employ the most effective method of restoring them to their original vibrancy. We only use premium paints that are environmentally friendly, ensuring a smooth finish without compromising on color quality. We also offer additional repair and maintenance services, so you can keep your shutters looking great for years to come. Get in touch with us today to find out how we can help make your shutters look as good as new!

Ultimate Guide to Oil Based Paints

Are you a homeowner who is considering using oil based paints for your home improvement projects? If so, then this guide is perfect for you! We’ll provide all the information that you need to know about oil-based paints, from their advantages and disadvantages to how they should be applied. With our comprehensive guide, we’ll help take away any doubts or confusion that may come up when deciding whether or not it is right for your project. Get ready to become an expert!

What is an oil based paint and what are its advantages and disadvantages

Advantages:

  • These paints have greater durability and a longer-lasting finish, as the oils in the paint help it adhere better to surfaces.
  • It contains mildewcide, which helps to minimize the growth of mildew, making them great for areas prone to humidity or moisture.
  • They provide improved adhesion on surfaces, so they are more reliable and less likely to peel or crack over time.
  • These paints require special equipment when applying, such as brushes or rollers specifically designed for use with oil-based products. This increases the accuracy of application and overall quality of the finish.
  • Oil-based paints may be more aesthetically pleasing due to their glossy sheen.
  • Finally, oil-based paints offer superior protection against moisture and heat damage when compared with latex options.

Disadvantages:

  • These paints can be difficult to work with and clean up, as the paint is made using solvent-based ingredients. This means that special precautions must be taken when using oil-based paints, such as wearing protective gloves, eyewear, and a mask while painting.
  • It take longer to dry than water-based paints and have an unpleasant smell due to the release of volatile organic compounds (VOCs) in the air. The VOCs released by oil-based paints could pose a health risk if inhaled over long periods of time.
  • They tend to be more expensive than water-based paints and may require additional equipment for proper application – such as a brush or roller specifically designed for use with oil-based products.
  • After being applied to walls or other surfaces, oil-based paints generally require more maintenance than water-based options. They are also more susceptible to cracking and peeling over time compared to latex products.

Tips on proper application, from start to finish

  • Follow all safety precautions such as wearing protective gloves, eyewear and a mask when applying oil-based paint.
  • Prep the surface for painting by removing any old paint layers and sanding down if necessary.
  • Apply primer to help ensure proper adhesion of the oil-based paint to the surface.
  • Mix your paint thoroughly before use, making sure that it is completely blended together in its container.
  • Use a brush or roller specifically designed for use with oil-based products for best results when applying your finished product.
  • Finally, allow plenty of time for drying (up to 24 hours) before touching up or adding additional coats of finish

Common mistakes made when using oil based paints, and how to avoid them

If oil-based paints come with the promise of a long-lasting, glossy finish, why are so many people making mistakes in using them? Well, it’s mostly because oil-based paints require some extra steps compared to regular latex or water-based paints. From using the right primer to wait times between coats, oil-based paint jobs can feel like a tedious task. It’s easy to rush through it and end up with an unsatisfactory result. Therefore, it’s essential to follow each instruction carefully, from prepping the surface correctly to making sure you give enough time for drying and curing. Otherwise, you could end up with a sticky mess or improper adhesion! In short, oil-based paints may be more challenging than your average DIY project – but if done right will provide you with that perfect finish you’ve been dreaming of.

How long do they last compared to other types of finishes

These paints have been around since the invention of paint, so you can assume they last forever, right? Wrong! Although oil-based finishes create a very durable, long lasting protective coating, they are not invincible. Oil-based paints may start to deteriorate faster than water-based finishes due to fading or yellowing from exposure to sunlight and water. Not only that, oil-based paints can also lose their shine over time. However, they do provide excellent protection and durability when maintained properly so don’t be discouraged! With proper maintenance, oil based alkyd paint can offer exceptional results for years and years to come.

Contact Our Professional Painters

At Cova Painting, we offer quality paint jobs for both your exterior and interior surfaces. Our experienced team is here to provide expert advice on oil-based paints so you can achieve a lasting finish. With years of knowledge in commercial and residential painting projects, let us help bring life back into your home! Contact us now to learn more about our services.

The Ultimate Guide to Staining a New Deck

Staining a new deck is the best way to protect and extend its lifespan, but it’s important to do it at the right time. If you stain your deck too early, you risk trapping moisture in the wood which can cause rot and other damage. But if you wait too long, your wood will be exposed for longer than necessary and could become damaged due to weather exposure or wear and tear from regular use. The ideal timing for staining a new deck is when it has had enough time to dry out completely after installation — usually about three months. This guide will provide a step-by-step guide on how to properly stain your new deck so that it lasts for many years of enjoyment!

Should I Stain A New Deck?

Staining a new deck is an essential step in protecting and prolonging its lifespan. Not only does it help preserve the wood’s natural beauty, but it also shields it from weather damage, wear and tear, rot, and other issues that can shorten its life. So if you’ve just had your deck installed or are thinking of having one built soon, staining should definitely be on your list of things to do! With proper care and maintenance — including regular staining — your new deck will stay looking great for years to come.

These are the benefits of staining a new deck:

  1. Protect and extend your deck’s lifespan with a stain job
  2. Keep the natural beauty of your new deck intact
  3. Shield from weather damage, wear and tear, rot, and more!
  4. Regular staining will ensure it looks great for years to come
  5. Get the peace of mind that you’re taking care of your new investment!

When is the Best Time to Stain Your Deck

If you’ve just had a new deck installed, it’s time to break out the stain! But when is the best time to do so? Well, if you want your deck to look its best for years and years without succumbing to weather damage or rot, then there is one golden rule: Don’t rush it. You need to allow enough time for your new decking material to dry out completely — usually about three months — before staining. That way, the stain can penetrate into the wood and provide maximum protection. So don’t be tempted by those impatient urges; take a deep breath and wait until after that magical three month period has passed before applying any stain! Trust us on this one – taking your time will pay off in spades!

Preparing Your Deck for Staining

So you’ve decided to take the plunge and stain your new deck – great idea! But before you get started, there’s one more important step: preparation. And don’t worry, it doesn’t have to be a chore. In fact, we find that prepping for staining can actually be kind of fun if you approach it with the right attitude. So put on some good tunes and let’s get ready for a little elbow grease! With these simple tips, you’ll have everything ready in no time flat so that your deck is primed and ready to go when the stain arrives. Let’s do this!

  1. Gather all necessary supplies such as a scrub brush, deck cleaner, and water hose
  2. Scrub down the surface of your new deck with a stiff-bristled brush to remove any dirt or debris
  3. Apply an appropriate cleaning solution to remove mildew, algae, and other organic growths from the wood
  4. Rinse thoroughly with a garden hose to ensure all cleaning solutions are removed
  5. Allow your decking material to dry out completely — usually about 3 days to a week — before staining
  6. Make sure you’re using the right type of stain for your specific kind of wood

Choosing the Right Stain for Your Deck

Choosing the right stain for your deck is an important step in protecting and extending its lifespan. Not only does it help preserve the wood’s natural beauty, but it also shields it from weather damage, wear and tear, rot, and other issues that can shorten its life. With so many different types of stains available on the market today, however, picking out the perfect one for your decking material can be a bit overwhelming. Fortunately, with just a few simple tips you’ll be able to find the best stain for your needs in no time!

To preserve the natural beauty of your deck and protect it from weather damage, wear and tear, rot, and more, there are several types of stains to choose from:

  • Water-Based Stains – These offer a wide variety of colors while also providing strong protection against water.
  • Oil-Based Stains – These give wood a warm glow while also providing excellent protection in harsher climates.
  • Semi-Transparent Stains – Great for highlighting the wood’s grain pattern without obscuring it with dark tones or heavy pigmentation.
  • Solid Color Stain – This type will provide an opaque look with uniform color throughout your decking material.
  • Clear Sealers – For those who want no color change but still want protection against UV rays and moisture damage.

Applying the Stain to Your New Deck

Now that you’ve chosen the perfect stain for your new deck, it’s time to apply it! But before you start, there are a few things you need to keep in mind. First and foremost, always make sure to read the manufacturer’s instructions carefully to ensure you’re using the product correctly. And secondly, always test the stain on a small, inconspicuous area of the decking material before applying it to the entire surface. That way, you can be sure you’re happy with the color and coverage before proceeding.

When applying the stain, always work in long, even strokes in the same direction as the wood grain. And be sure to allow plenty of time for the stain to dry completely between each coat – we recommend at least 24 hours. Once you’re finished, sit back and enjoy your beautiful new deck – now protected from the elements and looking great for years to come!

Maintaining and Cleaning Up

Maintaining and cleaning up after staining your deck may sound like a chore, but it doesn’t have to be! Proper maintenance can go a long way towards preserving the natural beauty of your deck and keeping it looking great for years.

Start by sweeping away any loose dirt or debris each week with a stiff-bristled brush. Regularly inspect your deck for any signs of wear and tear, and if necessary, apply a fresh coat of stain to keep it looking good as new. If you happen to get some excess stain on other surfaces such as plants or pavement, don’t worry – just use a damp cloth to wipe it away quickly before it dries. Finally, if you ever notice mildew or algae growing on your deck surface, treat and clean it with an appropriate cleaning solution right away. With just these few simple steps, you’re sure to have your outdoor living space looking its best all summer long!

Tips and Tricks for Optimizing Your Deck

When it comes to optimizing the durability and longevity of a newly-stained deck, there are a few tips and tricks that can help. First and foremost, always use a high-quality stain that is designed specifically for the kind of wood your deck is made from. If you go with a cheaper option, you may not get the protection you need or end up having to reapply it sooner than expected. Additionally, be sure to follow the directions on the stain precisely – this will help ensure optimal coverage and long-lasting protection. For example, applying too much or too little can lead to uneven results.

These Are Key To Maintain Durability and Longevity

Another key tip is to choose a semi-transparent or solid color stain over a clear sealer if you want maximum protection against sun damage and moisture. Clear sealers may look nice at first but they won’t do much to protect the underlying wood over time. On the other hand, semi-transparent stains offer some protection while still allowing any natural grain patterning to show through. And solid color stains provide more coverage for longer lasting results but don’t allow any of the wood’s natural beauty to peek through at all.

Finally, no matter what type of stain you decide on make sure you give it plenty of time to dry between each coat – we recommend waiting at least 24 hours in between applications for best results!

Additionally, remember to clean your deck regularly – sweeping away dirt and debris each week with a stiff-bristled brush will help keep it looking its best for years down the road. Lastly, if you ever notice signs of wear and tear or mildew/algae growth on your stained deck surface be sure to treat it right away with an appropriate cleaning solution so as not to compromise its life expectancy!

Staining your deck is a great way to enhance its natural beauty and protect it from the elements for years to come. With just a few simple steps, you can make sure that your outdoor living space looks amazing all summer long! From choosing the right stain and applying it correctly to regular maintenance and cleaning up after staining – these tips should help optimize the durability of your newly-stained deck so you can enjoy it season after season. So don’t wait any longer – get out there and give your outdoor oasis some much-needed TLC today!

Hiring a Professional Painter

You may think staining your deck is just a DIY job, but let’s be honest – it takes more than just a brush and a can of stain to get the job done right. Hiring a professional painter will ensure that your deck looks its absolute best, whether it’s brand new or in need of some TLC. They know exactly how much stain to apply, where and when to apply it, and even have the expertise to repair any damage and give your deck a fresh finish. Plus, you don’t have to worry about any messes or spills – professional painters take the time to clean up after themselves so you don’t have to!

When professionally done, your newly stained deck will last longer and look even better than before. You’ll be able to enjoy your outdoor oasis season after season without having to worry about water damage, fading colors, or mildew buildup. So why not save yourself some time and hassle by hiring the pros? After all, they’ve got the experience and know-how needed to make sure your deck not only lasts for years to come but also looks stunning in the process!

How to Paint Your Kitchen Cabinets in 9 Steps

Are you ready to take on a home improvement project and give your kitchen an entirely new look? Painting your kitchen cabinets is an easy and economical way to transform the feel of your kitchen – no remodel required! With some preparation and careful painting techniques, you can makeover your cabinetry in no time. Whether you’re aiming for a bright pop of color or classic neutral tones, sprucing up cabinets with paint will help create a unique space that will refresh the entire room. In this blog post, we’ll explore everything you need to know about prepping, priming, and painting your existing or new kitchen cabinets for beautiful results that will last for years!

How Much Does it Cost to Paint Kitchen Cabinets?

For anyone looking to transform the kitchen into something breathtaking and new, painting kitchen cabinets is an effective solution. However, it is important to be aware of the costs associated with such a project. The cost of kitchen cabinet painting varies widely depending on the size and condition of the kitchen cabinets as well as the labor and materials used for the job. Additionally, hire professionals that have experience in kitchen painting as they usually have access to better supplies and are able to perform a higher quality job than DIYers. In any case, kitchen cabinet painting can make a massive difference in the aesthetic appeal of kitchen space without breaking the bank!

Here’s a quick overview on cost:

  • The average cost of painting kitchen cabinets is $5,000 to $8,000. (Note: this can vary based on sq footage and the number of cabinets in the kitchen.)
  • Breakdown cost on doors, drawers and based of a cabinet:
    • Doors and Drawers – $50 – $75
    • Single cabinet base – $100 – $200

Again, it’s important to understand that the size of the doors and drawers also impact the price, which can either drive the cost up or down.

Should I Paint My Cabinets?

Refreshing kitchen cabinets with a new coat of paint can be an affordable and satisfying way to make your kitchen look updated. As you’re considering this project, make sure to assess the amount of work it might require. Inspect your kitchen cabinets carefully for any damage or sagging in need of repair, as painting will not fix these issues. Consider if any doors or drawers will need to be taken off during the process, along with how long the job will take depending on the size and complexity of your kitchen cabinets. Once you’ve assessed the time and labor involved with painting kitchen cabinets, you can decide if this is a project worth taking on.

What Type of Paint Do I Need for Cabinets?

Paint technology has come a long way in recent years, making the decision between oil-based and latex paint harder than ever. While many pros prefer oil for its hard finish and smoothing capabilities, those same qualities are achieved with 100 percent acrylic latex paints that offer greater durability & adhesion plus quick drying times – meaning no more waiting around to start your next project! We recommend Sherwin William’s Emerald Urethane Enamel, as it provides a harder, more durable paint film and level out to a smoother finished surface. The ultimate choice lies within you; regardless of either option chosen, quality finishes can be made.

Should you Brush or Spray?

Spraying kitchen cabinets

Painting kitchen cabinets is an achievable DIY project for most homeowners. Each approach – brushing or spraying – has pros and cons, and the choice should depend on the desired outcome. If you are hoping to achieve a flawless finish without visible brushstrokes, spraying may be the right choice given its ability to smooth out inconsistencies. On the other hand, if your kitchen cabinets have surface irregularities that must be dealt with prior to painting, then brushing can be more suitable as it will allow for precision touch-ups in hard-to-reach areas. As such, take time to think through both options before deciding which one is best for you.

Should I Strip or Paint Over My Kitchen Cabinets?

When it comes to kitchen cabinets, determining whether you should simply paint over them or strip them completely is a common dilemma facing homeowners. It can often be tempting to go with the simpler option of painting over them to avoid the extra time and effort that stripping requires. However, paint adheres best to a smooth surface, and if your kitchen cabinet doors are already showing signs of wear and tear, then painting over them may produce a less than optimal result. On the other hand, if you are simply looking for a fresh coat of paint, then having the kitchen cabinets professionally painted without stripping is an alternative worth considering. Whichever option you choose, keeping in mind the condition of your kitchen cabinets is key to ensuring a successful outcome and maximum satisfaction with your project!

Steps for Painting Cabinets

1.) Prepping your work area is key

Get your kitchen makeover underway with the right preparation!

  • Clear out cabinets and counters
  • Relocate furniture to another room
  • Protect surfaces from dust and fumes by covering them in plastic sheeting or rosin paper.
  • Don’t forget to mask off walls around cabinets before setting up a dedicated painting workspace.

With these few simple steps, you can ensure that no details are overlooked when it comes time to start painting.

2.)   Remove the doors, drawers, and shelves
  • Ensure you label all your cabinet doors and drawers with a marker to easily identify them. The best spot for the marking is behind where the hinges are located on each piece.
  • Once this has been done, unscrew the hinge screws from inside of frame before removing it completely – start labeling left-to-right then top-to bottom as you work around in numerical order. Don’t forget to number which edge corresponds with shelves or bottoms to match up easier later!
  • Take off any existing pull/hinges that can be reused again but mark its original location clearly by transferring numbering over onto exposed wood parts under one hinge, so mistakes won’t be made when reassembling at a later date!
  • Finally cover back up what was written down using more tape afterwards too just in case.
3.)  Clean all surfaces

Make sure your cabinet looks its best by thoroughly cleaning it prior to painting or staining

  • To do this, degreaser solution and a rag should be used for removal of any oils and grease that might interfere with the final finish. If ordinary cleaners cannot tackle tough messes, TSP is an effective alternative – just make sure you follow safety precautions as indicated on the container!
  • After all pieces have been cleaned up properly, complete with a thorough rinse before allowing them to dry off fully.
4.)  Prep the Base of the Cabinet
  • To make sure your project turns out smoothly and safely, open the windows for proper ventilation before you get to work.
  • Next, put on protective gear such as gloves or a mask – don’t forget it!
  • Using an abrasive pad with liquid deglosser, scrub down all surfaces then hold a rag underneath in case of any drips.
  • Wipe away the residue immediately after applying deglosser using another clean dampened rag – so that it doesn’t evaporate first!
  • If there are screws holes to fill from hardware being relocated use two-part polyester wood/autobody filler; mixing small batches at once since this hardens quickly (within 5 minutes!).
  • Once set remove excess material with paint scraper until completely hardened if necessary and sand smooth.
  • Finally scuff up cabinet doors, drawers & cabinets lightly using foam sanding block…this prepares them adequately for primer application afterwards.
5.)  Prime Cabinets, Doors, and Drawers

It’s time to get prepping! If you have a heavily stained project, apply stain-blocking primer for maximum coverage and speedy drying. Otherwise, oil or acrylic latex will do the trick in most situations. Not only does this help with stains but seals knots and other surface blemishes that can seep through top coats of paint!

  • Start by pouring some primer into a tray and loading up both a brush and roller – with the brush working along edges and tight spots while you use the roller on large surfaces such as cabinets, doors, or drawers.
  • Be sure to apply in long strokes across grain before lightly “tipping off” in one single stroke from end-to-end following underlying structures like where rails meet stiles – painting rail first slightly overlapping onto stile then moving on when dry.
  • When finished priming let all materials air out before washing down brushes & sleeves; pour excess back into container!
6.)  Sand, caulk and fill any discrepancies
  • For a beautiful, glass-smooth finish on your wood surfaces, start by sanding any flat areas with 220-grit paper.
  • Profiled edges can be smoothed using medium-gritted sanding sponges and fill in any dents or scratches you may find with vinyl spackle before lightly sanding the solution once it’s dry (about 60 minutes).
  • After taking care of all little bumps, they’ll need to be primed; use oil-based primer from spray cans for speedy coverage and wait an hour after primering before giving everything one more light and smooth touch up with 220 grit paper!
7.)  Now You’re Ready to Paint the Bases of the Cabinet

Congratulations, you’re almost ready for a fresh coat of paint! If your chosen color is comparable to the existing one, two coats may suffice – but if you are drastically changing it from dark to light or vice versa then don’t forget that three coats might be needed. Make sure each layer has its own brush and get painting!

Transform the look of your kitchen cabinets with some trim and cabinet enamel paint!

  • Start off by pouring a generous quantity into your paint tray.
  • Using both a brush and roller, carefully cut in along edges before using the first coat to cover any large flat surfaces.
  • A smooth-surface mini roller will provide an even texture on interior panels while you wait for it to dry; make sure to protect them from hardening with plastic bags afterwards.
  • Once complete, lightly sand between coats then apply one final layer– this should leave behind an immaculate finish without areas where wood shows through!
8.)  Prep, Prime and Paint the Door and Drawers

Priming and painting doors, drawers, and shelves requires a slightly different approach than cabinets. To reduce the risk of drips or runs in your paint job, it’s best to complete all work on a flat table surface.

  • Start by prepping around the panels before moving onto the main field followed lastly by stiles and rails at edges
  • Wipe away any excess from neighboring surfaces as you go along avoid lap marks for an even finish!
  • Get smooth and professional results with your painting project by using this simple method – when you’re finished, pick up the door at both its screw and hook so it hangs securely on a sturdy hanger.
  • Give your door a bit of extra air circulation with an easy hack – suspend it from a shower curtain rod or clothes bar to help speed up the drying process.
9.)  Assemble Your Cabinets
  • With a few coats of paint and easy reattachment, you can give your kitchen cabinets an entirely new look! Redecorating has never been quicker or more cost-effective.
  • Install your doors with ease! First, take off the tape over each number for easy identification. Then attach the hinges and knobs. Finally, hang them in their rightful place – you’ll be finished before you know it!
  • Give your drawers a fresh new look by swapping out their old pulls and installing some stylish replacements!

Giving your kitchen cabinets a facelift with paint is an easy, economical way to transform the look and feel of your entire kitchen – no remodel required! With some preparation and careful painting techniques, you can makeover your cabinetry in no time. At Cova Painting, our professional painters have years of experience prepping, priming, and painting all types of cabinets for beautiful results that will last. If you’re thinking about giving your kitchen cabinets a makeover, we’re here to help! Get a free no obligation estimate on your project today by calling us or Request a Quote online now.

5 Tips To Hire a Professional Painter for Your Home

Are you looking to give your home’s interior or exterior an exciting new makeover? Then hiring a professional painter is the perfect way to make sure that your painting project is done right! Whether you want to update a single room or completely renovate the outside of your home, this guide will help you find and hire the ideal professional painter for your needs. From understanding exactly what a professional painter can do for you, to tips on where and how to find the best qualified candidate – we’ve got all the information that you need. So, let’s get started transforming your house into an absolute masterpiece!


Here are 5 tips to hire the right candidate:

1. What To Look For In A Professional Painter

Hiring a professional painter can be a great investment, especially if you want to upgrade the appearance of your home or business. When you hire the right painter, the results will be worth it! To make sure that you hire the best of the best, look for painters with years of experience in their field, as this will guarantee quality results achieved in an efficient and timely manner. Make sure to also look for a business that is well reviewed by past customers and is certified by industry associations. Lastly, look for an individual or team who takes their craft seriously and ensures a high level of quality in their work. Investing properly here can save you time and money down the road!

2. How To Get The Most Out Of Your Painting Project

Painting projects can be a great way to update the look of your home or business. To get the most out of your project, it’s important to choose painters who have plenty of experience and are familiar with the building and types of products being used. Ask painters for references and do some research before hiring them to make sure they’ll do a quality job. Once painters have been hired, be sure to clearly communicate your expectations and provide as much documentation as possible regarding what you’d like done. This will help painters stay on schedule and avoid missed deadlines or misunderstandings. With the right painters, clear communication, and all the right documents in place, you are sure to get the most out of your painting project!

3. Tips For Choosing The Right Paint Colors

Choosing the right paint colors for your home can be difficult and overwhelming. When making the decision, one of the first things to consider is what painters will be using to achieve the desired color.Different painters use different methods and tools, so it’s important to make sure that whatever you choose can be achieved using what painters have on hand.If you are painting the interior of your home, you should consider your home’s natural lighting as this affects how colors appear in different rooms throughout the day.

In most cases, it is wise to pick a few colors from a chosen palette and sample them on a wall or an outside shingle before committing to an entire space or exterior body color – this means that painters can be sure they are providing you with a paint that will bring out the exact color you are hoping for. It is thus essential to give painters an accurate representation of what shade you want, since the names of colors on paint palettes may look nothing like the end result!

4. How To Prepare Your Home For Professional Painter

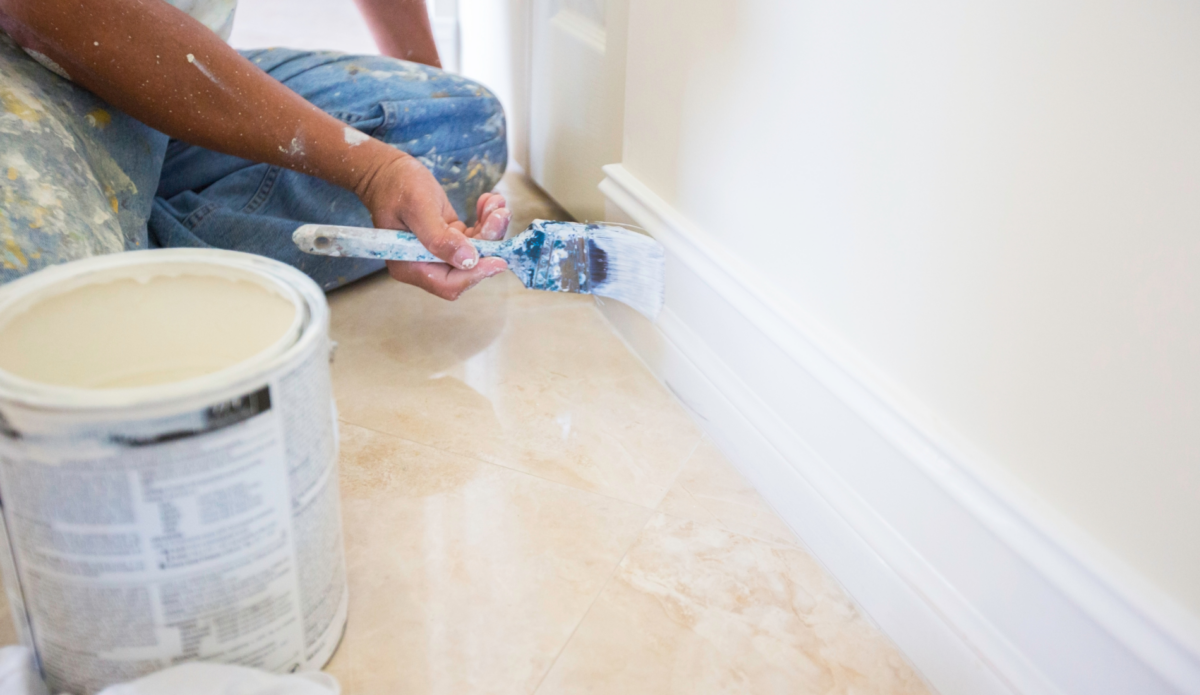
Painter paints baseboard in home

Painting your home is a fantastic way to instantly give it an updated look, but before you call in any painters to begin the task, there are a few important steps that must be taken to make sure everything runs smoothly during the painting process. Firstly, it’s important to clear away as much furniture and other items from the walls as you can. The painters will usually move larger pieces of furniture out of the way. However smaller items like curtains, wall art and any decorations that can be moved should be taken down prior to their arrival.

Secondly, ensure that surfaces are clean and dust-free. This means making sure any cobwebs or sticky surfaces have been wiped down so that paint can adhere properly. Finally, take a step back and inspect the walls for any existing damages such as dents or holes; painters will fill these in before they start painting – just make sure to inform them beforehand what needs attention! With these preparatory measures taken care of, you’ll be ready to watch your home transform into something new with a fresh coat of paint!

5. Inspect The Work Once It’s Completed

Inspecting the work of painters once it is completed is incredibly important in ensuring a job well done. This can help to identify any issues that may have been overlooked and naturally, the sooner those minor problems are fixed, the better. A thorough inspection requires taking a good look at everything from color saturation levels to careful examination of any trim work or surface details. Checking for any errors or inconsistencies is also a fundamental step in completing the job to satisfaction. Don’t hesitate to double-check painters’ work – mistakes appear more often than you’d think!


Why Redend Point is an Excellent Choice for Your Home’s Color Scheme

Every year, Sherwin-Williams announces their choice of a color of the year, and they have just announced Redend Point SW 9081 as their choice for 2023. This expressive blush-beige hue is perfect for anyone looking to make a statement with their home’s color palette. Let’s explore why this color is such a great option and how it can be used to create stunning visual effects in any home.

The Beauty of Blush-Beige

Since we’ve been spending more time at home than ever before, it’s become more crucial than ever for our houses to feel peaceful and tranquil, which is reflected year after year in the popularity of neutral home design. What role does a hue like Redend Point play in that, then?

Redend Point is the perfect combination of warm and cool tones. The blush hue adds a hint of warmth that creates an inviting atmosphere without feeling too overbearing. Meanwhile, the beige elements add subtle hints of cool tones that help to ground the look, ensuring that the overall palette doesn’t come across as too overpowering or overwhelming. The result is a perfectly balanced color scheme that can be used in virtually any style of home design.

Using Redend Point in Your Home Decor

Using Redend Point in Your Home Decor

The paints we use in and around our houses have a far wider role than just providing color. While color has an evident influence on the appearance of a room, it also has a direct and distinct impact on the feel of the area. With that strength, this year’s hue aims for intention and helps to inspire a rich, warm, and joyous temperament in every part of the home.

When it comes to decorating with Redend Point, there are many possibilities. For instance, you could use this hue as your main wall color or incorporate it into your accent walls for additional depth and dimension. You could also use this color on your furniture pieces such as couches, chairs, and tables to create beautiful visual accents throughout your space. And don’t forget about accessories like pillows, throw blankets, and rugs – these are all great places to incorporate Redend Point into your overall design scheme! As a result, it’s the ideal blend of neutral and panache that we may anticipate to see in 2023 home design and décor trends.

Pairing With Other Colors

In addition to being a great stand-alone shade, Redend Point pairs beautifully with other colors as well. Try combining it with brighter shades such as yellows and oranges for a more vibrant look or pair it with navy blues and deep greens for something more subtle yet still eye-catching. You could even combine different shades of reds and pinks together for a truly unique effect! No matter what type of look you’re going for, incorporating Redend Point into your home decor will help you create something truly special!

COLORS TO PAIR WITH REDEND POINT

Sherwin-Williams’ announcement of Redend Point SW 9081 as its 2023 Color Of The Year was good news indeed! This expressive blush-beige hue offers homeowners plenty of options when it comes to creating stylish visuals within their homes—whether they choose to use it as their main wall color or incorporate it into accent walls or furniture pieces. Best of all, Redend Point pairs beautifully with other colors so you can easily customize your look according to individual taste or style preference without ever having to worry about clashing colors or mismatched tones! So if you’re looking for an excellent way to spruce up your home’s decor this year without breaking the bank then consider giving Redend Point from Sherwin-Williams a try!

For the best results, most homeowners hire a professional painter to freshen up or completely repaint the interior of their home. To learn how we can help you, contact us today to get a free, no obligation quote.

What You Should Know About Ceiling Paint

The first step in repainting a room in your home is probably choosing on the color of the walls. But don’t forget to look up as well. Giving your ceilings a new coat of paint may brighten the space, hide flaws, and possibly even create a statement if you choose a bold color. Ceiling paint, which is sold separately from wall paint, is intended to make painting a ceiling simple and long-lasting.

What’s The Difference Between Wall Paint And Ceiling Paint?

Latex-based paint is most frequently used, when painting walls. This can facilitate smooth wall painting. But if you’ve ever tried to paint a wall with regular latex paint, you probably know how frequently the paint drips while you’re doing it. Now picture doing the same thing to the ceiling with paint. Since latex wall paint has a low viscosity, painting the ceiling with this kind of paint is a surefire way to get paint drips all over the floor.

Because ceiling paint is thicker than wall paint, it is less prone to spill when being applied. The conventional unit of measurement for viscosity is a Krebs Unit (KU), and the KU for the majority of ceiling paints is greater than the KU for the most of interior wall paints.

You can also get a sense of this at the paint store by holding a gallon of wall paint in one hand and a gallon of ceiling paint in the other. Since the gallon of ceiling paint contains more solids by weight than the gallon of wall paint, it should weigh more.

The greater thickness of ceiling paint not only makes application and cleanup easier but also improves its ability to conceal existing stains.

Types of Ceiling Paint

There are several choices in the area of ceiling paint. Take into account the purpose of the space you are painting in addition to the style of ceiling to choose the best sort of paint for the job.

  • Flat Acrylic – This is the most popular type of ceiling paint and is ideal for low-humidity environments like bedrooms and living rooms. Flat paint doesn’t reflect much light, making it ideal for most ceilings.
  • Satin Acrylic – In rooms with greater humidity levels, flat paint is more likely to discolor, crack, or chip. Because of this, satin sheen ceiling paint is preferable for ceilings in bathrooms, laundry rooms, and other more humid areas.
  • Semi-Gloss Acrylic – The ceilings directly above a shower stall or any other area subject to a lot of constant humidity are best suited for semi-gloss ceiling paint, which is the sort of paint least likely to crack in humid areas. 

types of ceiling paint finishes

Ceiling Paint Costs

A gallon of ceiling paint typically costs between $20 and $60. Up to 400 square feet, or one 20-by-20-foot room, may be covered by one gallon of paint. You will also need painter’s tape, a drop cloth, roller covers, paint brushes, and paint if you intend to DIY paint your ceilings. In the event that you don’t already have the required tools, it raises the price of ceiling paint.

If you hire a professional painter, the national average per square foot might cost anywhere from $1 to $2.50. Depending on the ceiling’s height, texture, paint color, and other factors, the price may increase.

Pros and Cons

Even if you go with the same general color, repainting your ceilings may seem like a lot of extra work for little return. A new coat of ceiling paint, though, may help the room look brighter, hide stains, and even add interest if you choose a bold color. Painting a ceiling is a reasonably cheap weekend job if you do it yourself.

Pros

  • As a material, ceiling paint is more viscous than wall paint, which reduces the likelihood of drips and increases the probability that stains on the ceiling will be covered.
  • Painting ceilings is a straightforward, inexpensive DIY project.
  • There are no restrictions, even if white is the customary color for ceiling paint. Having a dark ceiling and light walls may create a striking, dramatic impact.

Cons

  • It requires time and work to get ready to paint ceilings.
  • The greatest use for leftover ceiling paint is on other ceilings.
  • Doing the project yourself might be dangerous if the ceilings are high.

Other Things to Consider

Consider the type of ceiling when deciding how much paint to buy. Popcorn ceilings, in particular, will take more paint to cover the entire surface area uniformly. When purchasing additional painting materials, you should also consider the type of ceiling. Popcorn ceilings, for example, should be coated with a roller cover with a thick nap.

Ceiling paints are more viscous than wall paints, but not all ceiling paints are made equal. If you buy ceiling paint from a home improvement or specialty paint store, inquire about the differences in the ceiling paint products to discover which is best for your project.

Ceilings are most commonly painted in white or off-white tones. Painters frequently recommend tinting your ceiling paint with roughly one-third of the color used on the walls in the space if the walls are neutral. This unifies the room and might assist to emphasize the height of the walls.

When to Hire a Professional

It goes without saying that standing on a strong chair or ladder for a lengthy amount of time is required while painting ceilings. Depending on the height of the ceilings, this may need the use of a tall ladder, which is naturally unsafe for many individuals. Furthermore, painting ceilings in bigger buildings can be a time-consuming process.
A professional painter will have the necessary tools and expertise to accomplish the job with minimal disruption to your life.


When to Paint the Exterior of Your Home

You may paint the interior of your home at any time of year and in almost any situation. Since homes have regulated settings, it is possible to set the temperature and humidity to the ideal levels for painting.

It’s a very different story, though, when it comes to painting the exterior of houses. Unfortunately, your project’s success is frequently dependent on the environmental factors you deal with. You will need to tailor the project around the weather circumstances rather than the other way around. So when is the ideal time to repaint the outside of your home?

When Should I Paint My House’s Exterior?

The best time to paint a house’s exterior is generally thought to be during the summer. The weather is pleasant and the chance of rain has decreased by that time of year.

In different regions of the country and the world, summer does not always imply the same thing (or span the same months). Therefore, it’s more crucial to concentrate on the days that have the right weather than it is on the season.

Rain

Not all of summer is suitable for painting, particularly in locations that receive hurricanes or monsoon-like weather near the end of summer. Residents in hurricane-prone areas of Texas, Louisiana, and Florida cannot depend entirely on the summer for painting. When painting in areas like these, begin the project early in the year or postpone it until the cool fall months.

Heat and Direct Sunlight

The possibility of rain impeding outdoor painting is simple to focus on. Still, it’s best to stay out of the sun and really hot temperatures. It takes enough time for the water in water-based latex paint to naturally evaporate before the paint has a chance to dry. Less fragile is oil-based paint. Oil-based paint has a greater curing temperature range, with a range of up to 10 degrees on each end, even though it takes longer to cure than water-based paint. Paint will prematurely cure in the presence of heat and sunlight, drying instantaneously after application. Avoid this by not painting while the the sun is directly overhead or shining directly onto the surface to be painted.

Additionally, you must wait for an hour or two after the sun has set for the home siding to cool.
Keep inspecting the surface for dark siding or for thick materials like fiber-cement that have a tendency to hold heat.
The surface should be prepared for painting when it is cold to the touch.

Painting During Autumn

When deciding to paint the outside of your house, temperature changes are another crucial aspect to take into account. When temperatures change much, as when a day hits 105°F then lowers to 43°F in the evening, paint doesn’t dry effectively. Due to the fact that daytime and evening temperatures are frequently closer than at other times of the year, early fall may also be a good time of year to paint.

Painting During Winter

It might be challenging to properly paint the outside of a house during the winter in some regions of the nation since many paint manufacturers advise a minimum outdoor temperature for painting. However, the minimum temperature requirements rise as paint quality improves. In the past, it was advised never to paint a home while the temperature was below 50°F. But with today’s paint formulas, you can paint in as little as 35°F. What this means for American homeowners painting their homes is that they should stop painting about November. Southern American states allow for comfortable painting until December. In reality, certain regions of the United States are sufficiently temperate that year-round painting is acceptable.

Painting in Moist Conditions

Paint should only be applied on a dry surface as a general rule. When painting outside, there is a chance that the surface may become wet, either from snow and rain or from the humidity in the air. Do a thorough inspection of the surface you’ll be painting if you’re unclear whether moisture is present on your outside; if it feels damp in the least, do not apply paint. This is especially valid if you recently went through bad weather. Your home’s inside may be moist even though the exterior doesn’t feel wet to the touch, especially if it’s composed of porous materials like untreated wood or masonry. It’s better to put off starting another painting project until the rain has stopped for at least a full day.

Remember that moisture may occur indirectly as well; it doesn’t necessarily manifest itself as a powerful rainstorm. Even though it was a dry 70°F just six hours ago, dew that forms overnight or in the early evenings can just as readily harm exterior paint.

Paint Quality

Exterior painting is one of the most important elements in home maintenance, as it can protect your home from severe weather conditions and impacts the overall aesthetics. Therefore, when selecting paint for the outside of your home, quality should take precedence over cost. It is important to choose a weatherproof option with a long lifespan to guarantee you don’t have to repaint for years to come. In addition, choosing an appropriate color palette carefully can be beneficial too; different colors reflect levels of heat differently and can lead to more efficient temperature regulation throughout your home year-round. Exterior painting requires a good level of planning, with selecting suitable paint being one of the most vital considerations from start to finish.

If you are looking for quality paint, Sherwin Williams has a wide range of weatherproof and durable color options.

Why You Should Hire A Professional

There are three major reasons why homeowners hire professional painters:
  1. They Have The Skills And Experience

    One of the most important reasons to hire a professional painter is because they have the skills and experience needed to get the job done right. Painters have been trained in their field and know how to properly complete the task at hand. They also have a great deal of experience, which means they know how to troubleshoot any problems that may arise.

  2. They Save You Time And Money

    Another reason to hire a professional painters is because they can save you time and money. When you hire a professional, you don’t have to spend time researching how to do the job or learning what tools and materials are needed. Additionally, they have access to discounts and can often get the job done more quickly than someone who is not experienced. This can save you money in the long run.

  3. They Provide A Quality Service

    When you hire a professional painter, you can be confident that you will receive a quality service. Professionals stand behind their work and will make sure that you are satisfied with the final product. Additionally, they will usually offer some type of warranty or guarantee in case something goes wrong.


If you are looking to hire a professional painter for your next home project, we have you covered. Contact us for a free no obligation estimate today.