
Overview of the Challenges Posed by Water Stains
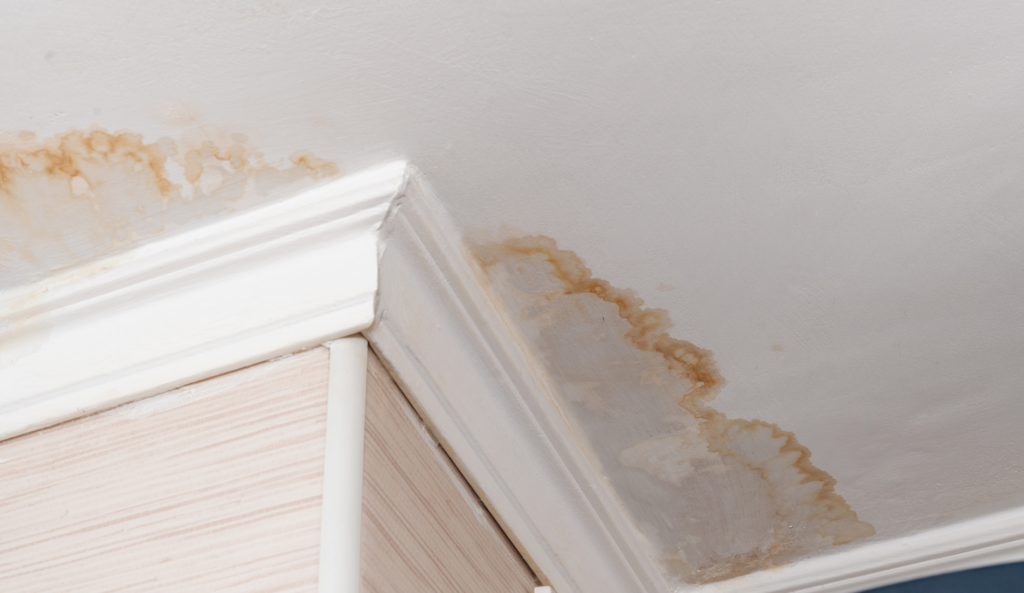
Water stains on walls and ceilings can be an unsightly issue that not only affects the overall aesthetics of your home but may also indicate underlying problems. These stains often result from leaks, plumbing issues, or condensation, and if left unaddressed, they can lead to more severe damage such as mold growth, structural deterioration, and compromised indoor air quality.
The challenges posed by water stains include:
- Aesthetic Concerns: Water stains can detract from the visual appeal of your living space, making it look unkempt and poorly maintained. They can also cause discoloration and unevenness on painted surfaces, which can be difficult to conceal.
- Underlying Issues: Water stains are often symptomatic of more significant problems like leaks, poor ventilation, or inadequate insulation. Addressing the root cause is crucial to prevent further staining and potential damage to your property.
- Surface Preparation: Painting over water stains requires thorough surface preparation to ensure proper adhesion and coverage. This may involve cleaning, sanding, and repairing damaged areas, which can be time-consuming and labor-intensive.
- Primer and Paint Selection: Choosing the right primer and paint products is essential for effectively covering water stains and achieving a professional-looking finish. Stain-blocking primers and high-quality paints are necessary to ensure lasting results.
- Proper Application Techniques: Painting over water stains requires careful attention to detail and proper application techniques to avoid streaks, uneven coverage, and visible marks after the paint has dried.
By understanding these challenges, you can better equip yourself to tackle water stains on your walls and ceilings, ensuring a successful and long-lasting paint job that restores the beauty of your living space.
Identifying the Source of Water Stains
Inspecting your home for leaks, plumbing issues, or condensation problems is an essential step in addressing water stains on walls and ceilings. Identifying and resolving the underlying cause of the stains not only prevents further damage but also ensures that your paint job remains intact and long-lasting.
Here are some steps to help you inspect and identify potential issues:
- Visual Inspection: Start by examining the stained area and its surroundings for any signs of water damage, such as discoloration, peeling paint, or warped materials. Look for any visible leaks, moisture, or dampness on surfaces.
- Check Plumbing: Inspect nearby pipes, faucets, and fixtures for any signs of leaks or damage. Pay close attention to areas where pipes pass through walls or ceilings, as these can be common sources of water issues.
- Examine Roof and Gutters: If the water stains are located on the ceiling or upper walls, check your roof for damaged or missing shingles, clogged gutters, or other issues that could lead to water intrusion.
- Inspect HVAC Systems: Condensation problems can often result from poorly functioning heating, ventilation, and air conditioning systems. Check for proper insulation around ducts, adequate ventilation, and well-sealed windows and doors.
- Assess Home Humidity Levels: High humidity levels can lead to condensation and water damage. Use a hygrometer to measure indoor humidity, and consider using dehumidifiers or improving ventilation if necessary.
- Look for Structural Issues: Cracks or gaps in the foundation, walls, or ceilings can allow water to seep into your home. Examine your property’s structure for any signs of damage or areas that may need repair.
- Consult a Professional: If you have difficulty identifying the source of the water stains or suspect significant damage, it’s best to consult a professional plumber, roofer, or contractor for a thorough assessment and recommendations on how to address the issue.
Preparing the Surface for Painting
Cleaning and Drying the Stained Area
Before painting over water stains, it’s crucial to properly clean and dry the affected area to ensure optimal adhesion of primer and paint. Start by wiping down the stained surface with a damp cloth or sponge to remove any dirt, dust, or debris. You may also use a mild detergent or cleaning solution if necessary, but be sure to rinse thoroughly to eliminate any residue that could interfere with paint application. Once cleaned, allow the area to air dry completely, as excess moisture can cause paint to peel or blister over time. If the stain is particularly stubborn, you might consider using a specialized stain remover or a mixture of water and bleach to treat the area, but always follow the manufacturer’s instructions and take proper safety precautions.
Removing Loose Paint or Damaged Materials
Before tackling water stains with paint, it’s essential to remove any loose paint or damaged materials from the affected area. This step ensures a smooth and even surface for primer and paint application, ultimately resulting in a professional-looking finish. Begin by using a scraper, putty knife, or a wire brush to gently remove any peeling or flaking paint around the water stain. Be cautious not to damage the underlying surface while doing so. If you encounter any damaged drywall or plaster, carefully cut away the affected section and replace it with new material, patching and sanding as needed for a seamless repair. In cases of extensive damage, you may need to consult a professional for proper restoration.
Sanding and Smoothing the Surface
Sanding and smoothing the surface is a crucial step in preparing your walls and ceilings for painting over water stains. This process helps to create an even, uniform surface that allows for better adhesion of primer and paint, ultimately resulting in a flawless finish. Start by using a medium-grit sandpaper (around 100-120 grit) to gently sand the affected area, focusing on any rough or uneven spots caused by water damage or previous paint layers. Be sure to apply light, consistent pressure and move in circular motions for best results. After sanding, switch to a fine-grit sandpaper (180-220 grit) to further smooth out the surface and eliminate any remaining imperfections. Once you’ve achieved a satisfactory level of smoothness, wipe down the area with a damp cloth or tack cloth to remove any dust or debris created during the sanding process.
Choosing the Right Primer and Paint
Using stain-blocking primers is of utmost importance when painting over water stains, as they provide a crucial barrier that prevents the stain from bleeding through the new paint. These primers are specifically designed to seal and cover a variety of stains, including water, smoke, and grease marks, ensuring a flawless and long-lasting finish. Here are some key reasons why stain-blocking primers are essential:
- Prevent Stain Bleed-through: Stain-blocking primers contain special ingredients that create a barrier between the stain and the paint, preventing the discoloration from seeping through and ruining the appearance of your freshly painted surface.
- Improved Adhesion: These primers also help improve the adhesion of paint to the surface, reducing the likelihood of peeling or flaking over time. This is particularly important when dealing with water-damaged surfaces that may have compromised paint adhesion.
- Uniform Color: Stain-blocking primers provide a consistent base color, ensuring an even and uniform finish when applying the topcoat. This helps in achieving better coverage and prevents the stained area from appearing darker or lighter than the surrounding paint.
- Time and Cost Efficiency: By effectively covering water stains with a stain-blocking primer, you can reduce the number of paint coats needed to achieve full coverage. This saves both time and money on your painting project.
- Long-lasting Results: Using a high-quality stain-blocking primer is crucial for achieving a durable, long-lasting paint job that effectively conceals unsightly water stains and maintains its appearance over time.
Primer Recommendations are as follows:
- Zinsser White BIN Shellac: A high-performance, fast-drying primer-sealer that provides excellent stain-blocking capabilities, exceptional adhesion, and superior odor-blocking properties, making it an ideal choice for painting over water stains and various other surface imperfections.
- White Pigmented Shellac Primer can be used as a full interior primer or as a spot exterior primer and permanently seals out the toughest stains and odors in one coat. Ideal for fire restoration work, White Pigmented Shellac Primer is extremely effective in blocking stubborn stains caused by fires, floods and pets as well as imbedded cooking and cigar smoke odors.
Applying the Primer
To achieve even coverage when applying primer, follow these proper application techniques:
- Mix Primer: Stir the primer well before use to ensure consistent texture and optimal performance.
- Select Appropriate Tools: Use suitable brushes, rollers, or sprayers specifically designed for primer application to achieve even coverage.
- Apply Thin Coats: Apply the primer in thin, even coats, avoiding heavy application that can lead to drips, runs, or uneven coverage.
- Proper Technique: Employ the correct brush or roller technique, such as feathering or crosshatching, to create a smooth and uniform primer layer.
- Drying Time: Allow the primer to dry fully according to the manufacturer’s recommendations before applying another coat of primer.
- Overlap Strokes: Slightly overlap your brush or roller strokes during primer application to avoid visible lines or gaps in coverage.
- Tinted Primer: For dark-colored topcoats, consider using a tinted primer that matches the topcoat color to improve coverage and reduce the number of paint coats needed.
- Inspect Surface: Carefully inspect the primed surface for any missed spots or uneven areas, addressing them before moving on to paint application.
Painting Over the Primed Surface
Tips for achieving a seamless finish
To achieve a seamless finish when painting over small primed areas, follow these tips:
- Mix Paint Thoroughly: Stir the paint well before use to ensure consistent color and texture throughout the application.
- Choose the Right Tools: Select the appropriate brushes or small foam rollers for your paint type and surface to achieve a smooth and even finish.
- Thin, Even Coats: Apply paint in thin, even coats, allowing each coat to dry fully according to the manufacturer’s recommendations before applying additional coats.
- Feathering Technique: Use the feathering technique by lightly brushing the paint outwards from the primed area towards the existing paint to create a gradual transition and avoid visible lines or edges.
- Maintain a Wet Edge: Work systematically around the small primed area, keeping a wet edge as you move to prevent visible lap marks.
- Edge Cutting: If the primed area is near edges, corners, or trim, carefully cut in with a high-quality angled brush to create a seamless transition between the two.
- Lighting: Ensure proper lighting during the painting process to accurately assess coverage and identify any areas that may require additional attention or touch-ups.
- Blending: Gently blend the new paint into the surrounding area to create a seamless transition, paying attention to avoid creating hard lines or edges.
- Inspect and Touch Up: After the final coat has dried, carefully inspect the painted area for any unevenness, missed spots, or imperfections. Touch up as necessary to achieve a seamless finish.
Ensuring Even Drying and Curing for Long-Lasting Results
Allowing paint to properly dry and cure after application is crucial for achieving a durable and long-lasting finish. The drying process involves the evaporation of solvents or water from the paint, while curing refers to the hardening and bonding of the paint’s components to the surface. It is essential to follow the manufacturer’s recommended drying times between coats and before exposing the painted surface to regular use. This ensures optimal adhesion, color retention, and resistance to wear and tear. Additionally, maintaining proper ventilation and temperature during the drying and curing process helps promote an even and consistent finish, ultimately contributing to the overall longevity and appearance of your painting project.
Maintaining the Painted Surface
Regularly inspecting areas where you have recently painted is essential for detecting signs of new water damage and ensuring the longevity of your paint job. By closely monitoring locations such as roofs, gutters, plumbing fixtures, windows, and newly painted surfaces, you can identify any leaks, moisture infiltration, or excess humidity that may compromise the appearance and integrity of the fresh paint. Keep an eye out for symptoms like peeling or bubbling paint, mold growth, and damp or discolored surfaces, which can indicate the presence of water damage. Timely intervention helps prevent more extensive damage to both the paint and the underlying structure, saving you time and money on repairs. By proactively inspecting your freshly painted surfaces for signs of water damage, you can preserve their aesthetic appeal and protect your property from costly damage.
Hiring A Professional Painter
With Cova Painting’s team of skilled and experienced painters, we provide attention to detail, ensuring that your surfaces not only look stunning but also remain protected from potential damage. Our expertise in surface preparation, paint selection, and application techniques guarantees a seamless and long-lasting finish. In addition, Cova Painting can help identify areas prone to water damage and recommend preventive measures to preserve the integrity of your newly painted surfaces. By entrusting your painting needs to our team, you can enjoy a stress-free experience and the confidence that your property is in capable hands. For a free consultation, you can contact us here.