
Step aside, dark and dated wood trim—it’s time for a fresh and fabulous makeover! Painting your wood trim white is like giving your living space a rejuvenating facial, instantly brightening and modernizing your home’s appearance. This simple yet transformative DIY project not only elevates your interiors to magazine-worthy status, but also enhances natural light and creates the illusion of more spacious rooms. So let’s bid farewell to the days of dreary, outdated trim and embrace the crisp, clean charm of white woodwork that breathes new life into your humble abode.
Preparing for the Project
Choosing the right shade of white for your space
Selecting the perfect shade of white for your space is crucial to achieving a harmonious and visually appealing result. With countless variations of white paint available, each with its own subtle undertones, it’s essential to find the one that complements your existing color palette and enhances your room’s overall aesthetic. The right shade of white can create a warm, welcoming atmosphere or a cool, sophisticated vibe, effortlessly transforming your interiors while staying true to your personal style. So, let’s dive into the world of whites and discover the ideal hue for your space.
We have found that this shades of white are the most popular shades:
- Pure White: A crisp, clean shade with no undertones, perfect for a modern and minimalist look
- Swiss Coffee: A warm and creamy off-white, adding a touch of coziness to any space
- Simply White: A versatile and bright white with a hint of warmth, adaptable to various styles and color schemes
- Alabaster: A soft and subtle white with gray undertones, ideal for creating a serene and calming environment
- Decorator’s White: A cool white with slight blue undertones, great for achieving a sophisticated and elegant feel
- Cloud White: A gentle white with a touch of creaminess, perfect for creating a warm and inviting atmosphere
- White Dove: A popular choice for its balance between warm and cool undertones, suitable for both traditional and contemporary spaces
- Chantilly Lace: A cool, crisp white that adds a fresh and airy quality to any room
- Super White: A bold and bright option with minimal undertones, making a statement in high-contrast interiors
- China White: A muted, warm white with beige undertones, perfect for creating a cozy and inviting ambiance
Gathering necessary materials and tools
Before embarking on your trim-painting journey, it’s essential to gather all the necessary materials and tools to ensure a smooth and efficient process. Having everything at hand not only saves time but also helps you achieve a professional-looking finish. Equip yourself with high-quality paint, primer, brushes, rollers, sandpaper, painter’s tape, and drop cloths to protect your floors and furniture. With these essentials in your arsenal, you’ll be well-prepared to tackle your painting project with confidence and ease.
Let’s dive deeper into those essential items:
- Shellac-Based Primer: Highly effective at blocking wood tannins and preventing bleed-through, ensuring a uniform and long-lasting finish on your white trim
- Semi-gloss or satin finish paint: Durable and easy to clean, these finishes provide an attractive sheen that highlights architectural details and resists wear and tear on trim.
- Angled sash brushes: Ideal for precise cutting-in and application on trim, these brushes provide better control and a smoother finish, ensuring professional results.
- Small foam or microfiber rollers: Perfect for a smooth and even application on trim, these rollers minimize brush marks and provide a professional, flawless finish.
- Sandpaper: Depending on the condition, 100 – 120 grit is ideal to level and smooth out imperfections. If you discover paint is flaking, you will need to scrap and use 80 grit, use a 100 – 120 grit to smooth the surface for paint.
- Blue painter’s tape or FrogTape: These tapes provide clean, sharp edges while preventing paint bleed-through, ensuring a precise and professional-looking trim finish. Note: When applying to a wall, be sure to use gentle painter’s tape. And remember to never leave tape on for hours or overnight as this will rip off the sheetrock paper or existing paint.
- Drop cloths
Preparing the workspace
Removing furniture and covering floors
Before painting your trim, it’s crucial to properly prepare the workspace to ensure a hassle-free and efficient process. Start by removing furniture from the room or moving it to the center and covering it with drop cloths or plastic sheets. This step protects your belongings from accidental paint splatters and drips. Additionally, cover your floors with drop cloths or rosin paper, securing them with painter’s tape to prevent shifting. By taking these precautions, you’ll create a safe and clean environment that allows you to focus on achieving a flawless trim finish without the worry of damaging your living space.
Cleaning the wood trim
It’s essential to thoroughly clean the surface to ensure proper paint adhesion and a smooth finish. Over time, dirt, dust, and grime can accumulate on the trim, which may hinder paint from bonding effectively. Use a mixture of mild dish soap and warm water to gently clean the trim, paying close attention to any grooves, corners, and detailed areas. After cleaning, rinse the surface with a damp cloth to remove any soap residue and allow it to dry completely.
Step-by-Step Process for Painting Wood Trim White
Sanding the trim
Proper technique
Before sanding, use a vacuum or soft-bristled brush to remove any dirt and dust from the trim.
Use medium-grit sandpaper (100 to 120 grit) to level and smooth out imperfections. If there are areas with flaking paint, use 80 grit sandpaper to scrape it away before continuing with the finer grit.
Sand in the direction of the wood grain, using gentle strokes to achieve an even finish.
After sanding, wipe down the surface with a damp cloth to remove any dust residue and allow it to dry completely before painting
Importance of creating a smooth surface
Creating a smooth surface is important to ensure a uniform and long-lasting finish on the trim. It also helps achieve a professional-looking finish with minimal brush marks, as well as preventing paint from bleeding through and highlighting the architectural details of the trim. Sanding down any imperfections or flaking paint also ensures that the primer and paint will properly adhere to the surface, providing better coverage and durability.
Applying painter’s tape
Problem: Painters tape can be a great tool to help achieve clean, sharp edges when painting trim.
Agitate: Without the proper technique, however, painters tape can cause more harm than good. It’s important to use caution and take extra steps to ensure that it doesn’t damage your walls or existing paint.
Solution: Use painter’s tape only as a guide for cutting in and creating straight lines; never leave it on for hours or overnight as this will rip off the sheetrock paper or existing paint. Be sure to use gentle painter’s tape when applying it directly onto walls. Additionally, always test the adhesion of the tape before starting your project by pressing down firmly along all edges and corners with your finger. This ensures that you won’t have any surprises once you start painting!
Priming the trim
Selecting the right primer
Shellac-Based Primer is an essential tool for painting trim since it is highly effective at blocking out wood tannins and preventing bleed-through. This ensures an even and long-lasting paint finish, which highlights architectural details and resists wear and tear. The shellac primer seals the wood grain, creating a smooth surface that allows for seamless application of paint. Additionally, it dries quickly so you can continue to your next step without waiting too long.
Application tips
- First, wipe down the surface with a damp cloth to remove any dirt and dust residue before applying the shellac primer.
- Stir the shellac primer thoroughly before using it, ensuring that all of the ingredients are blended well.
- Use an angled sash brush for precise application on trim, which provides better control and a smoother finish. Begin by cutting in along corners and edges, and then use the brush to fill in the rest of the trim.
- Move in one direction only while brushing on trim to avoid any potential streaks or drips.
- Make sure not to over-brush as this can cause brush strokes that are difficult to fix later.
- For small areas or detailed sections, you may opt for a small foam or microfiber roller for a smooth and even application without leaving behind any brush marks.
- Allow the shellac primer to dry completely before applying paint; this usually takes around 30 minutes but can vary depending on temperature and humidity conditions.
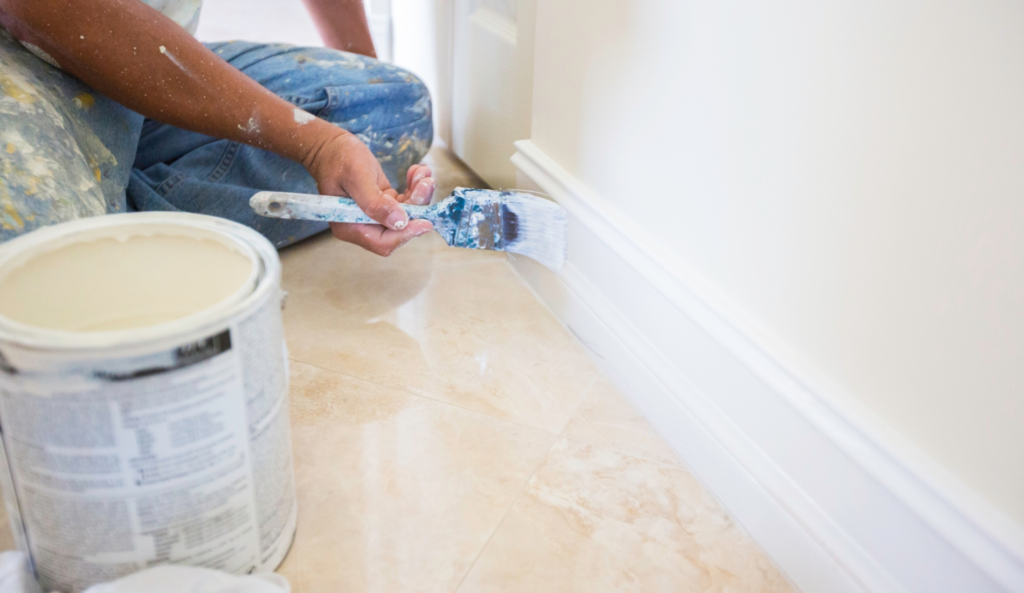
Painting the trim
When painting the trim with finish paint, start by stirring the paint thoroughly before using it.
- Use an angled sash brush for precise application on trim, which provides better control and a smoother finish. Begin by cutting in along corners and edges, and then use the brush to fill in the rest of the trim.
- Move in one direction only while brushing on trim to avoid any potential streaks or drips; make sure not to over-brush as this can cause brush strokes that are difficult to fix later.
- For small areas or detailed sections, you may opt for a small foam or microfiber roller for a smooth and even application without leaving behind any brush marks.
- Make sure to apply thin, even coats as this will ensure a uniform look throughout your trim.
- Allow each coat to dry completely before applying additional coats; drying time can vary depending on temperature and humidity conditions.
- Pull the tape gently in one direction, starting from a corner or edge of the trim and slowly pulling away from the surface to ensure that no paint is being pulled off with it. Make sure not to wait for too long before removing as this can cause issues with existing paint and or sheetrock.
Recommended Paint Brands
Shellac-Based Primers
- Zinsser B-I-N Shellac-Base Primer: This is an interior primer that provides excellent stain blocking and adhesion properties, making it ideal for prepping wood trim before painting. It is specifically formulated to adhere to glossy surfaces, seal porous surfaces, and block out odors from smoke or pets. It also dries quickly and is easy to sand.
- White Pigmented Shellac Primer can be used as a full interior primer or as a spot exterior primer and permanently seals out the toughest stains and odors in one coat. Ideal for fire restoration work, White Pigmented Shellac Primer is extremely effective in blocking stubborn stains caused by fires, floods and pets as well as imbedded cooking and cigar smoke odors.
High Quality Premium Paint
- Emerald Urethane Trim Enamel by Sherwin Williams is a premium, high-quality paint that provides superior durability and superior coverage. The advanced urethane resin-based enamel formula offers exceptional protection against fading, cracking, and peeling, while the smooth elastomeric finish allows for easy application and produces an even and uniform finish. It also features strong adhesion to a variety of surfaces such as wood, metal, drywall, and masonry. This paint is low odor and quick drying so projects are completed in no time.
- ProClassic Waterborne Interior Acrylic Enamel: Achieve a smooth and luxurious finish on interior doors and trim with ProClassic® Interior Acrylic Enamel. It delivers a high-performing, non-yellowing finish that withstands even the toughest wear and tear. This waterbourne acrylic paint formula goes on smooth without brush or roller marks.
- Benjamin Moore Advanced Interior: A premium quality, waterborne alkyd paint that offers a full line of durable high-end finishes ideal for doors, trim and cabinetry.
Lets Recap
Now that you have a better understanding of the steps and materials required to paint trim, it’s time to get started on your project. With this step-by-step guide, you now know how to properly prime and paint your wood trim for optimal results that will last for years to come. If all of this sounds too intimidating or time consuming, consider hiring Cova Painting – our experienced team is always ready and willing to handle any project! No matter which route you choose, we hope these tips help make your next painting experience easier than ever before.