
Staining a new deck is the best way to protect and extend its lifespan, but it’s important to do it at the right time. If you stain your deck too early, you risk trapping moisture in the wood which can cause rot and other damage. But if you wait too long, your wood will be exposed for longer than necessary and could become damaged due to weather exposure or wear and tear from regular use. The ideal timing for staining a new deck is when it has had enough time to dry out completely after installation — usually about three months. This guide will provide a step-by-step guide on how to properly stain your new deck so that it lasts for many years of enjoyment!
Should I Stain A New Deck?
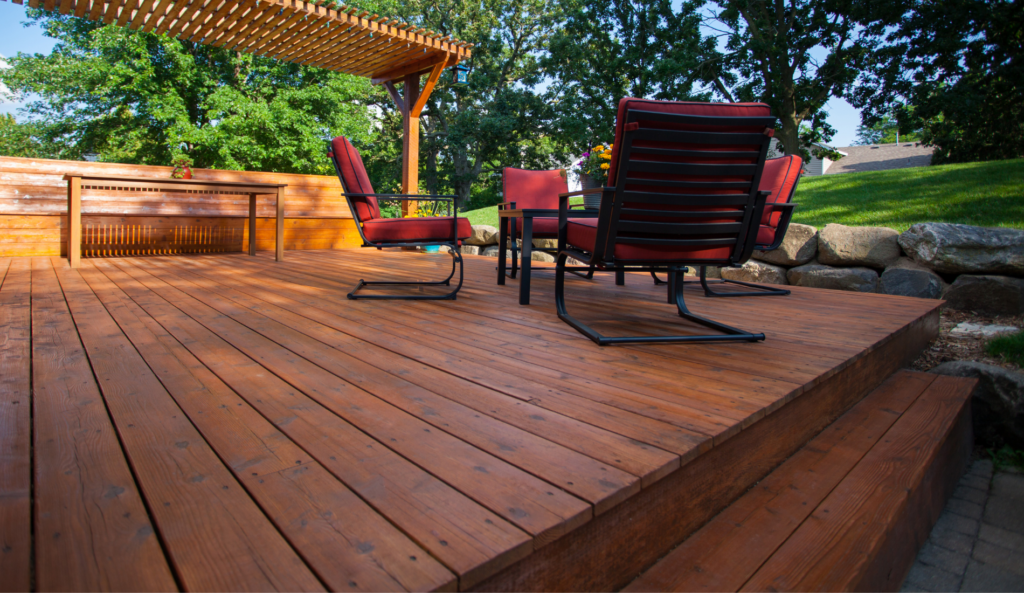
Staining a new deck is an essential step in protecting and prolonging its lifespan. Not only does it help preserve the wood’s natural beauty, but it also shields it from weather damage, wear and tear, rot, and other issues that can shorten its life. So if you’ve just had your deck installed or are thinking of having one built soon, staining should definitely be on your list of things to do! With proper care and maintenance — including regular staining — your new deck will stay looking great for years to come.
These are the benefits of staining a new deck:
- Protect and extend your deck’s lifespan with a stain job
- Keep the natural beauty of your new deck intact
- Shield from weather damage, wear and tear, rot, and more!
- Regular staining will ensure it looks great for years to come
- Get the peace of mind that you’re taking care of your new investment!
When is the Best Time to Stain Your Deck
If you’ve just had a new deck installed, it’s time to break out the stain! But when is the best time to do so? Well, if you want your deck to look its best for years and years without succumbing to weather damage or rot, then there is one golden rule: Don’t rush it. You need to allow enough time for your new decking material to dry out completely — usually about three months — before staining. That way, the stain can penetrate into the wood and provide maximum protection. So don’t be tempted by those impatient urges; take a deep breath and wait until after that magical three month period has passed before applying any stain! Trust us on this one – taking your time will pay off in spades!
Preparing Your Deck for Staining
So you’ve decided to take the plunge and stain your new deck – great idea! But before you get started, there’s one more important step: preparation. And don’t worry, it doesn’t have to be a chore. In fact, we find that prepping for staining can actually be kind of fun if you approach it with the right attitude. So put on some good tunes and let’s get ready for a little elbow grease! With these simple tips, you’ll have everything ready in no time flat so that your deck is primed and ready to go when the stain arrives. Let’s do this!
- Gather all necessary supplies such as a scrub brush, deck cleaner, and water hose
- Scrub down the surface of your new deck with a stiff-bristled brush to remove any dirt or debris
- Apply an appropriate cleaning solution to remove mildew, algae, and other organic growths from the wood
- Rinse thoroughly with a garden hose to ensure all cleaning solutions are removed
- Allow your decking material to dry out completely — usually about 3 days to a week — before staining
- Make sure you’re using the right type of stain for your specific kind of wood
Choosing the Right Stain for Your Deck
Choosing the right stain for your deck is an important step in protecting and extending its lifespan. Not only does it help preserve the wood’s natural beauty, but it also shields it from weather damage, wear and tear, rot, and other issues that can shorten its life. With so many different types of stains available on the market today, however, picking out the perfect one for your decking material can be a bit overwhelming. Fortunately, with just a few simple tips you’ll be able to find the best stain for your needs in no time!
To preserve the natural beauty of your deck and protect it from weather damage, wear and tear, rot, and more, there are several types of stains to choose from:
- Water-Based Stains – These offer a wide variety of colors while also providing strong protection against water.
- Oil-Based Stains – These give wood a warm glow while also providing excellent protection in harsher climates.
- Semi-Transparent Stains – Great for highlighting the wood’s grain pattern without obscuring it with dark tones or heavy pigmentation.
- Solid Color Stain – This type will provide an opaque look with uniform color throughout your decking material.
- Clear Sealers – For those who want no color change but still want protection against UV rays and moisture damage.
Applying the Stain to Your New Deck
Now that you’ve chosen the perfect stain for your new deck, it’s time to apply it! But before you start, there are a few things you need to keep in mind. First and foremost, always make sure to read the manufacturer’s instructions carefully to ensure you’re using the product correctly. And secondly, always test the stain on a small, inconspicuous area of the decking material before applying it to the entire surface. That way, you can be sure you’re happy with the color and coverage before proceeding.
When applying the stain, always work in long, even strokes in the same direction as the wood grain. And be sure to allow plenty of time for the stain to dry completely between each coat – we recommend at least 24 hours. Once you’re finished, sit back and enjoy your beautiful new deck – now protected from the elements and looking great for years to come!
Maintaining and Cleaning Up
Maintaining and cleaning up after staining your deck may sound like a chore, but it doesn’t have to be! Proper maintenance can go a long way towards preserving the natural beauty of your deck and keeping it looking great for years.
Start by sweeping away any loose dirt or debris each week with a stiff-bristled brush. Regularly inspect your deck for any signs of wear and tear, and if necessary, apply a fresh coat of stain to keep it looking good as new. If you happen to get some excess stain on other surfaces such as plants or pavement, don’t worry – just use a damp cloth to wipe it away quickly before it dries. Finally, if you ever notice mildew or algae growing on your deck surface, treat and clean it with an appropriate cleaning solution right away. With just these few simple steps, you’re sure to have your outdoor living space looking its best all summer long!
Tips and Tricks for Optimizing Your Deck
When it comes to optimizing the durability and longevity of a newly-stained deck, there are a few tips and tricks that can help. First and foremost, always use a high-quality stain that is designed specifically for the kind of wood your deck is made from. If you go with a cheaper option, you may not get the protection you need or end up having to reapply it sooner than expected. Additionally, be sure to follow the directions on the stain precisely – this will help ensure optimal coverage and long-lasting protection. For example, applying too much or too little can lead to uneven results.
These Are Key To Maintain Durability and Longevity
Another key tip is to choose a semi-transparent or solid color stain over a clear sealer if you want maximum protection against sun damage and moisture. Clear sealers may look nice at first but they won’t do much to protect the underlying wood over time. On the other hand, semi-transparent stains offer some protection while still allowing any natural grain patterning to show through. And solid color stains provide more coverage for longer lasting results but don’t allow any of the wood’s natural beauty to peek through at all.
Finally, no matter what type of stain you decide on make sure you give it plenty of time to dry between each coat – we recommend waiting at least 24 hours in between applications for best results!
Additionally, remember to clean your deck regularly – sweeping away dirt and debris each week with a stiff-bristled brush will help keep it looking its best for years down the road. Lastly, if you ever notice signs of wear and tear or mildew/algae growth on your stained deck surface be sure to treat it right away with an appropriate cleaning solution so as not to compromise its life expectancy!
Staining your deck is a great way to enhance its natural beauty and protect it from the elements for years to come. With just a few simple steps, you can make sure that your outdoor living space looks amazing all summer long! From choosing the right stain and applying it correctly to regular maintenance and cleaning up after staining – these tips should help optimize the durability of your newly-stained deck so you can enjoy it season after season. So don’t wait any longer – get out there and give your outdoor oasis some much-needed TLC today!
Hiring a Professional Painter
You may think staining your deck is just a DIY job, but let’s be honest – it takes more than just a brush and a can of stain to get the job done right. Hiring a professional painter will ensure that your deck looks its absolute best, whether it’s brand new or in need of some TLC. They know exactly how much stain to apply, where and when to apply it, and even have the expertise to repair any damage and give your deck a fresh finish. Plus, you don’t have to worry about any messes or spills – professional painters take the time to clean up after themselves so you don’t have to!
When professionally done, your newly stained deck will last longer and look even better than before. You’ll be able to enjoy your outdoor oasis season after season without having to worry about water damage, fading colors, or mildew buildup. So why not save yourself some time and hassle by hiring the pros? After all, they’ve got the experience and know-how needed to make sure your deck not only lasts for years to come but also looks stunning in the process!