
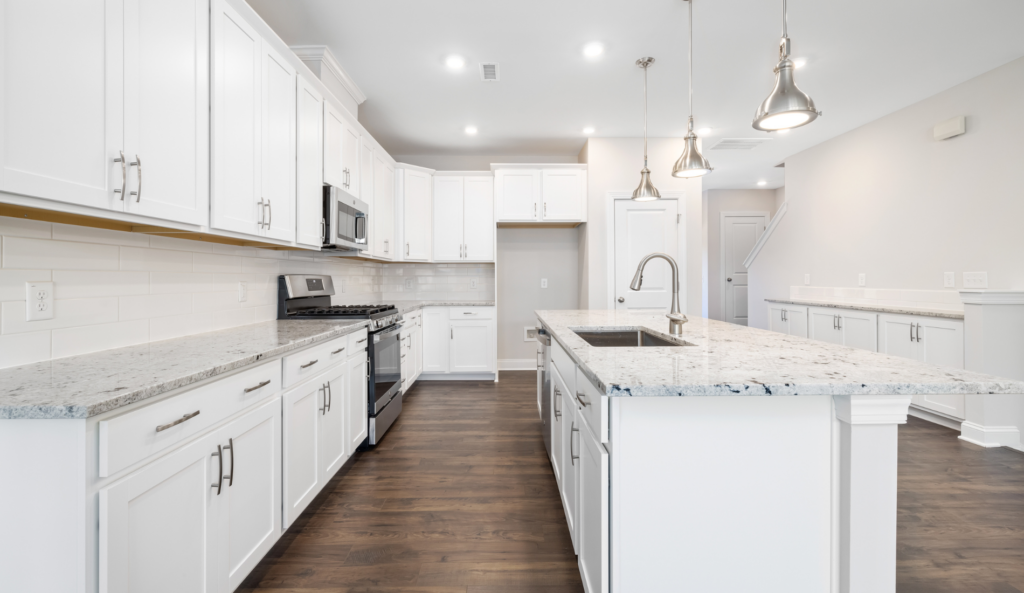
Are you ready to take on a home improvement project and give your kitchen an entirely new look? Painting your kitchen cabinets is an easy and economical way to transform the feel of your kitchen – no remodel required! With some preparation and careful painting techniques, you can makeover your cabinetry in no time. Whether you’re aiming for a bright pop of color or classic neutral tones, sprucing up cabinets with paint will help create a unique space that will refresh the entire room. In this blog post, we’ll explore everything you need to know about prepping, priming, and painting your existing or new kitchen cabinets for beautiful results that will last for years!
How Much Does it Cost to Paint Kitchen Cabinets?
For anyone looking to transform the kitchen into something breathtaking and new, painting kitchen cabinets is an effective solution. However, it is important to be aware of the costs associated with such a project. The cost of kitchen cabinet painting varies widely depending on the size and condition of the kitchen cabinets as well as the labor and materials used for the job. Additionally, hire professionals that have experience in kitchen painting as they usually have access to better supplies and are able to perform a higher quality job than DIYers. In any case, kitchen cabinet painting can make a massive difference in the aesthetic appeal of kitchen space without breaking the bank!
Here’s a quick overview on cost:
- The average cost of painting kitchen cabinets is $5,000 to $8,000. (Note: this can vary based on sq footage and the number of cabinets in the kitchen.)
- Breakdown cost on doors, drawers and based of a cabinet:
- Doors and Drawers – $50 – $75
- Single cabinet base – $100 – $200
Again, it’s important to understand that the size of the doors and drawers also impact the price, which can either drive the cost up or down.
Should I Paint My Cabinets?
Refreshing kitchen cabinets with a new coat of paint can be an affordable and satisfying way to make your kitchen look updated. As you’re considering this project, make sure to assess the amount of work it might require. Inspect your kitchen cabinets carefully for any damage or sagging in need of repair, as painting will not fix these issues. Consider if any doors or drawers will need to be taken off during the process, along with how long the job will take depending on the size and complexity of your kitchen cabinets. Once you’ve assessed the time and labor involved with painting kitchen cabinets, you can decide if this is a project worth taking on.
What Type of Paint Do I Need for Cabinets?
Paint technology has come a long way in recent years, making the decision between oil-based and latex paint harder than ever. While many pros prefer oil for its hard finish and smoothing capabilities, those same qualities are achieved with 100 percent acrylic latex paints that offer greater durability & adhesion plus quick drying times – meaning no more waiting around to start your next project! We recommend Sherwin William’s Emerald Urethane Enamel, as it provides a harder, more durable paint film and level out to a smoother finished surface. The ultimate choice lies within you; regardless of either option chosen, quality finishes can be made.
Should you Brush or Spray?

Painting kitchen cabinets is an achievable DIY project for most homeowners. Each approach – brushing or spraying – has pros and cons, and the choice should depend on the desired outcome. If you are hoping to achieve a flawless finish without visible brushstrokes, spraying may be the right choice given its ability to smooth out inconsistencies. On the other hand, if your kitchen cabinets have surface irregularities that must be dealt with prior to painting, then brushing can be more suitable as it will allow for precision touch-ups in hard-to-reach areas. As such, take time to think through both options before deciding which one is best for you.
Should I Strip or Paint Over My Kitchen Cabinets?
When it comes to kitchen cabinets, determining whether you should simply paint over them or strip them completely is a common dilemma facing homeowners. It can often be tempting to go with the simpler option of painting over them to avoid the extra time and effort that stripping requires. However, paint adheres best to a smooth surface, and if your kitchen cabinet doors are already showing signs of wear and tear, then painting over them may produce a less than optimal result. On the other hand, if you are simply looking for a fresh coat of paint, then having the kitchen cabinets professionally painted without stripping is an alternative worth considering. Whichever option you choose, keeping in mind the condition of your kitchen cabinets is key to ensuring a successful outcome and maximum satisfaction with your project!
Steps for Painting Cabinets
1.) Prepping your work area is key
Get your kitchen makeover underway with the right preparation!
- Clear out cabinets and counters
- Relocate furniture to another room
- Protect surfaces from dust and fumes by covering them in plastic sheeting or rosin paper.
- Don’t forget to mask off walls around cabinets before setting up a dedicated painting workspace.
With these few simple steps, you can ensure that no details are overlooked when it comes time to start painting.
2.) Remove the doors, drawers, and shelves
- Ensure you label all your cabinet doors and drawers with a marker to easily identify them. The best spot for the marking is behind where the hinges are located on each piece.
- Once this has been done, unscrew the hinge screws from inside of frame before removing it completely – start labeling left-to-right then top-to bottom as you work around in numerical order. Don’t forget to number which edge corresponds with shelves or bottoms to match up easier later!
- Take off any existing pull/hinges that can be reused again but mark its original location clearly by transferring numbering over onto exposed wood parts under one hinge, so mistakes won’t be made when reassembling at a later date!
- Finally cover back up what was written down using more tape afterwards too just in case.
3.) Clean all surfaces
Make sure your cabinet looks its best by thoroughly cleaning it prior to painting or staining
- To do this, degreaser solution and a rag should be used for removal of any oils and grease that might interfere with the final finish. If ordinary cleaners cannot tackle tough messes, TSP is an effective alternative – just make sure you follow safety precautions as indicated on the container!
- After all pieces have been cleaned up properly, complete with a thorough rinse before allowing them to dry off fully.
4.) Prep the Base of the Cabinet
- To make sure your project turns out smoothly and safely, open the windows for proper ventilation before you get to work.
- Next, put on protective gear such as gloves or a mask – don’t forget it!
- Using an abrasive pad with liquid deglosser, scrub down all surfaces then hold a rag underneath in case of any drips.
- Wipe away the residue immediately after applying deglosser using another clean dampened rag – so that it doesn’t evaporate first!
- If there are screws holes to fill from hardware being relocated use two-part polyester wood/autobody filler; mixing small batches at once since this hardens quickly (within 5 minutes!).
- Once set remove excess material with paint scraper until completely hardened if necessary and sand smooth.
- Finally scuff up cabinet doors, drawers & cabinets lightly using foam sanding block…this prepares them adequately for primer application afterwards.
5.) Prime Cabinets, Doors, and Drawers
It’s time to get prepping! If you have a heavily stained project, apply stain-blocking primer for maximum coverage and speedy drying. Otherwise, oil or acrylic latex will do the trick in most situations. Not only does this help with stains but seals knots and other surface blemishes that can seep through top coats of paint!
- Start by pouring some primer into a tray and loading up both a brush and roller – with the brush working along edges and tight spots while you use the roller on large surfaces such as cabinets, doors, or drawers.
- Be sure to apply in long strokes across grain before lightly “tipping off” in one single stroke from end-to-end following underlying structures like where rails meet stiles – painting rail first slightly overlapping onto stile then moving on when dry.
- When finished priming let all materials air out before washing down brushes & sleeves; pour excess back into container!
6.) Sand, caulk and fill any discrepancies
- For a beautiful, glass-smooth finish on your wood surfaces, start by sanding any flat areas with 220-grit paper.
- Profiled edges can be smoothed using medium-gritted sanding sponges and fill in any dents or scratches you may find with vinyl spackle before lightly sanding the solution once it’s dry (about 60 minutes).
- After taking care of all little bumps, they’ll need to be primed; use oil-based primer from spray cans for speedy coverage and wait an hour after primering before giving everything one more light and smooth touch up with 220 grit paper!
7.) Now You’re Ready to Paint the Bases of the Cabinet
Congratulations, you’re almost ready for a fresh coat of paint! If your chosen color is comparable to the existing one, two coats may suffice – but if you are drastically changing it from dark to light or vice versa then don’t forget that three coats might be needed. Make sure each layer has its own brush and get painting!
Transform the look of your kitchen cabinets with some trim and cabinet enamel paint!
- Start off by pouring a generous quantity into your paint tray.
- Using both a brush and roller, carefully cut in along edges before using the first coat to cover any large flat surfaces.
- A smooth-surface mini roller will provide an even texture on interior panels while you wait for it to dry; make sure to protect them from hardening with plastic bags afterwards.
- Once complete, lightly sand between coats then apply one final layer– this should leave behind an immaculate finish without areas where wood shows through!
8.) Prep, Prime and Paint the Door and Drawers
Priming and painting doors, drawers, and shelves requires a slightly different approach than cabinets. To reduce the risk of drips or runs in your paint job, it’s best to complete all work on a flat table surface.
- Start by prepping around the panels before moving onto the main field followed lastly by stiles and rails at edges
- Wipe away any excess from neighboring surfaces as you go along avoid lap marks for an even finish!
- Get smooth and professional results with your painting project by using this simple method – when you’re finished, pick up the door at both its screw and hook so it hangs securely on a sturdy hanger.
- Give your door a bit of extra air circulation with an easy hack – suspend it from a shower curtain rod or clothes bar to help speed up the drying process.
9.) Assemble Your Cabinets
- With a few coats of paint and easy reattachment, you can give your kitchen cabinets an entirely new look! Redecorating has never been quicker or more cost-effective.
- Install your doors with ease! First, take off the tape over each number for easy identification. Then attach the hinges and knobs. Finally, hang them in their rightful place – you’ll be finished before you know it!
- Give your drawers a fresh new look by swapping out their old pulls and installing some stylish replacements!
Giving your kitchen cabinets a facelift with paint is an easy, economical way to transform the look and feel of your entire kitchen – no remodel required! With some preparation and careful painting techniques, you can makeover your cabinetry in no time. At Cova Painting, our professional painters have years of experience prepping, priming, and painting all types of cabinets for beautiful results that will last. If you’re thinking about giving your kitchen cabinets a makeover, we’re here to help! Get a free no obligation estimate on your project today by calling us or Request a Quote online now.